STONE CREST PHOTOGRAMMETRY ASSET WORKFLOW
Working on the assets for the online platform I thought it would be good to reveal a bit about the workflow behind them. The article below will not be a step-by-step “tutorial” about how photogrammetry assets are made, rather a more general insights about the workflow used by MADCHAMO.
From capturing and cleaning to retopology and texture baking, the goal is simple: create an efficient, high-quality asset while staying true to the original object’s character. There will be also tips and useful resources and information along the way, so I hope you will enjoy this small article.
– Cosmin –
SUBJECT SELECTION AND SHOOTING
The first and probably the most difficult task is to find and decide upon the item you are willing to scan and process. Generally I like to search and scan assets that are historically interesting, this being the major selling point of MADCHAMO – historically accurate assets for 3D environments.
So, our usual suspect for today is a Steyr Stone Crest located on the sides of the Neptunbrunnen fountain in Linz Hauptplatz.
The Neptunbrunnen itself? Oh, it’s a proper grand affair, a Baroque beauty erected way back in the early 18th century. Commissioned to give thanks for the end of a particularly nasty plague (always a good reason for some impressive stonework!), it’s been the watery heart of Linz ever since. Neptune, the god of freshwater and the sea, stands proudly in the center, surrounded by all sorts of mythical sea creatures and, yes, those very crests we’re so keen on. There are multiple crests located on all sides of the fountain.
For the preparation phase I had to pray to the god of weather to take the sun away. Overcast skies are our go-to for stone, as diffused light reveals subtle details without harsh shadows. This softer illumination is allowing for a more even and accurate representation of the geometry and texture. Beyond the atmospheric conditions, I also ensure the immediate area around our subject is clear of any loose debris that could potentially introduce noise into the scan data. This meticulous preparation, however subtle, plays a vital role in ensuring the fidelity of our final historical asset.
TIP: Use tools like Sun Surveyor or Photopills to track weather and lighting conditions for optimal outdoor shooting. Consistent lighting can make or break a good scan.
TIP: Aim for at least 60–80% overlap between photos. More is better – photogrammetry software relies on common details between shots for accurate alignment.
RAW PROCESSING
Before jumping into any scan project, it’s essential to pre-process your RAW photos in a free tool like RawTherapee or Darktable. I wouldn’t a recomend using Lightroom since making images linear there is tricky – yet crucial for color accuracy.
Although most photogrammetry tools can import RAWs directly, batch-editing them beforehand lets us apply universal adjustments like exposure, white balance, vignette and chromatic aberration removal. Just avoid pixel-specific edits like sharpening or denoising, as these can confuse the scan algorithm.
After preprocessing, I export the images as 16-bit TIFFs. This format preserves color depth and detail while remaining compatible with most photogrammetry software. Yes, they’re large, but they offer the best quality for scanning. Once the project is complete, you can safely delete them and retain just the original RAWs.
My preprocessing goals are simple: remove any technical flaws that might interfere with alignment, while avoiding any artistic edits that might distort real-world data. This includes:
- White balance correction for consistent color temperature
- Exposure tuning to bring all images to a similar brightness
- Vignette and chromatic aberration removal to eliminate optical artifacts
- Lens distortion correction
All images are captured in RAW format to preserve as much information as possible. I shoot in full manual mode—locking ISO, aperture, and shutter speed across the session. This avoids exposure inconsistencies, which can cause alignment or texturing issues down the line. Even though I shoot handheld, I maintain a stable grip and consistent distance throughout the session to reduce motion blur or focus errors.
TIP: Export your TIFFs in Rec. 709 gamma or with a linear tone curve to keep color values neutral. Avoid exporting in 8-bit formats like JPG or PNG because these will limit your ability to adjust textures later in the pipeline.
ALIGNMENT & 3D PROCESSING
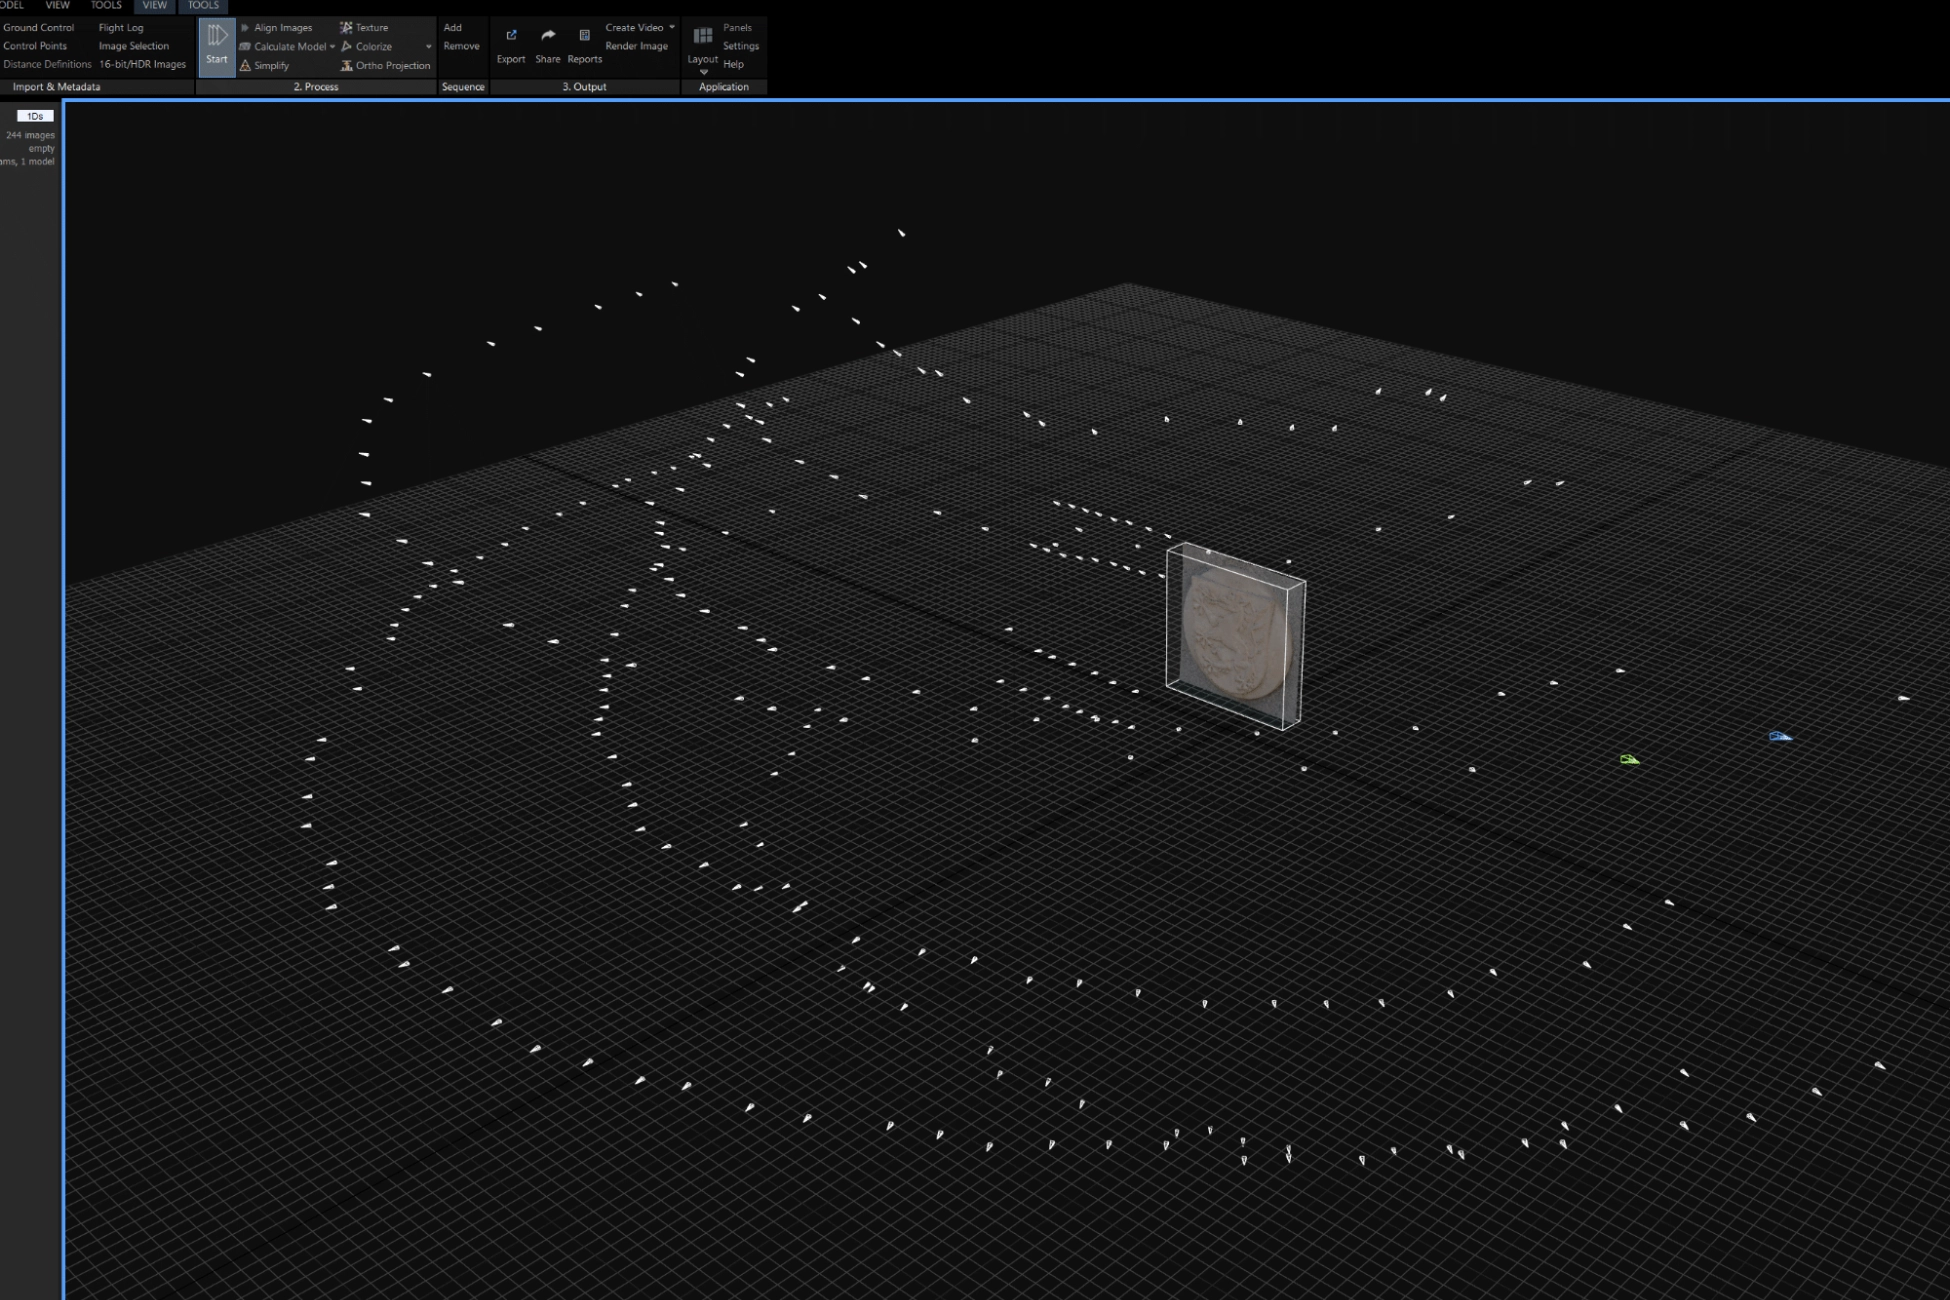
Once our images are prepped and ready, it’s time to load them into a photogrammetry application. For most of my projects, RealityCapture is the go-to choice.
For this asset I took over 300 photos with a Nikon Z6II and as lense I used NIKKOR MC 105/2.8 S. This macro lense is very sharp and allows me to take photos from a distance as well as close up for capturing more details.
The first step in the process is alignment, where the software matches key features across multiple photos, figuring out the camera positions. This stage is crucial for accuracy – if your photo set is well-captured, the software will align them seamlessly. If there are issues, such as poor overlap or inconsistent focus, the alignment might fail or produce errors like misaligned geometry or “floating” points.
Next comes the mesh generation: the magic that converts the cloud of points into an actual 3D model. RealityCapture will process the points and create a mesh that represents the object’s geometry.
The raw-scan object exported from RealityCapture was trimmed in blender using the trim brush. Also other sculpting adjustments were made like a slight overall polish to help reduce some noise.
TIP: RealityCapture’s alignment is fast and robust, but don’t forget to disable any blurry or redundant photos before starting. Want to dive deeper into best practices? Check out Reality Capture’s alignment guide.
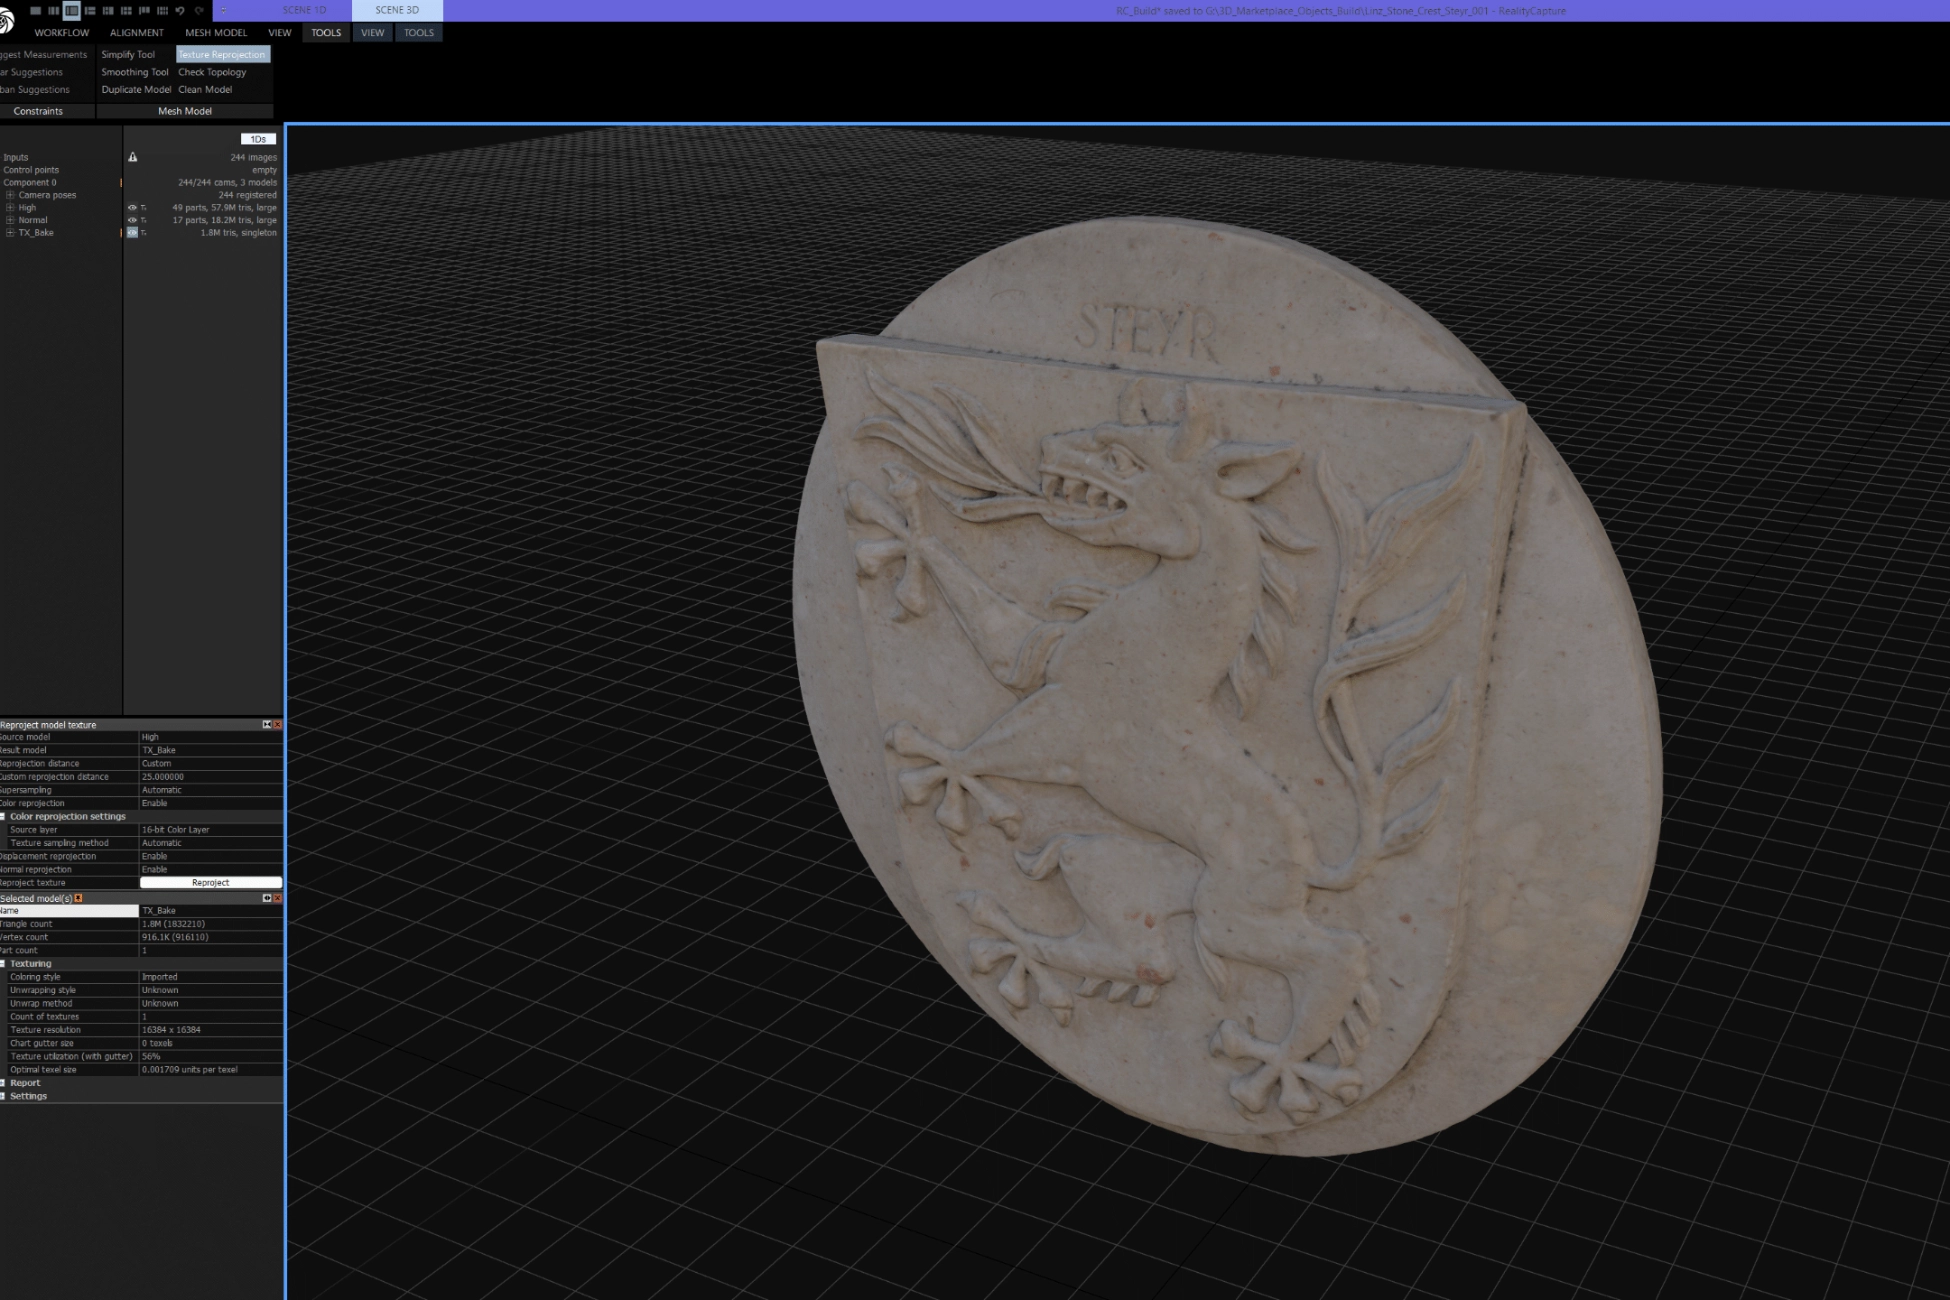
RAW SCAN PREP & MESH QUALITY CHECK
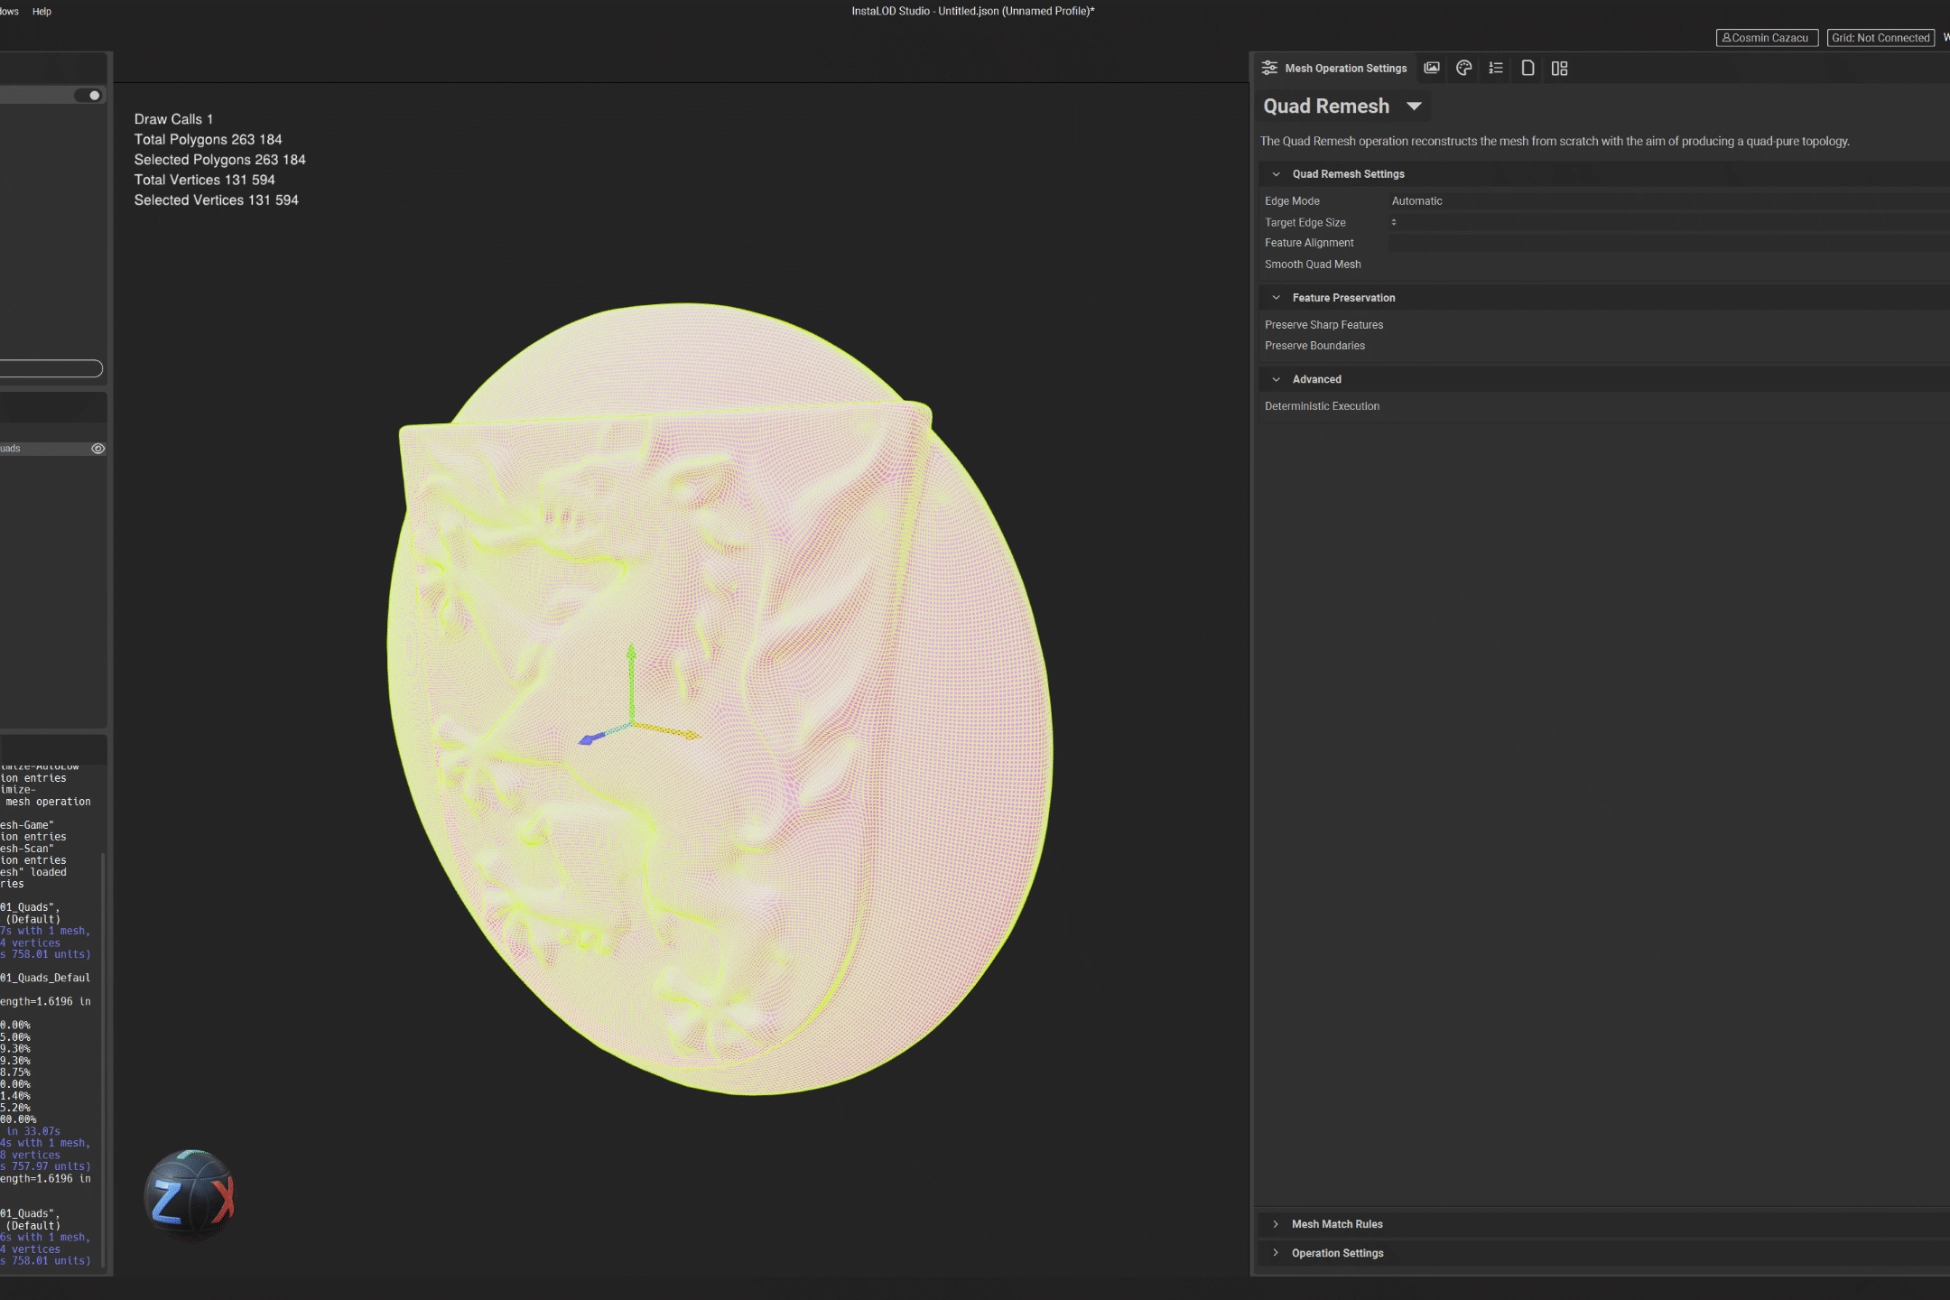
I use InstaLOD to process the raw scan data and generate the LOD0 model. InstaLOD is indispensable for refining the raw scan data, thanks to its robust capabilities in creating Level of Detail (LOD) models, generating clean quadrilateral meshes (Quad Remesh), and optimizing triangle distribution with Isotropic Remesh. These tools are vital for ensuring the model is both visually precise and geometrically sound, reducing potential artifacts and ensuring consistency for subsequent stages like reprojection.
For efficiency, I recommend skipping the Deterministic Execution setting in InstaLOD—it can be time-consuming and doesn’t show significant improvements in quality for most of our scans. The final step in this phase is using Mesh Optimize to resolve common scan issues such as T-Junctions, Unwelded Vertices, and, most importantly, Degenerate Polygons. This process ensures that the mesh is clean, optimized, and ready for further refinement.
TIP: When using InstaLOD, be sure to check for degenerate polygons early in the process. These can cause major issues when you move to texturing and final render stages.
In the image on the right, you can see the final optimized mesh result after running the raw scan through InstaLOD’s processing tools. The settings I’ve used here are the ones I typically rely on for ensuring a clean, high-quality mesh ready for the next stages of texturing and UV unwrapping. InstaLOD’s Mesh Toolkit provides a range of powerful tools to optimize your model.
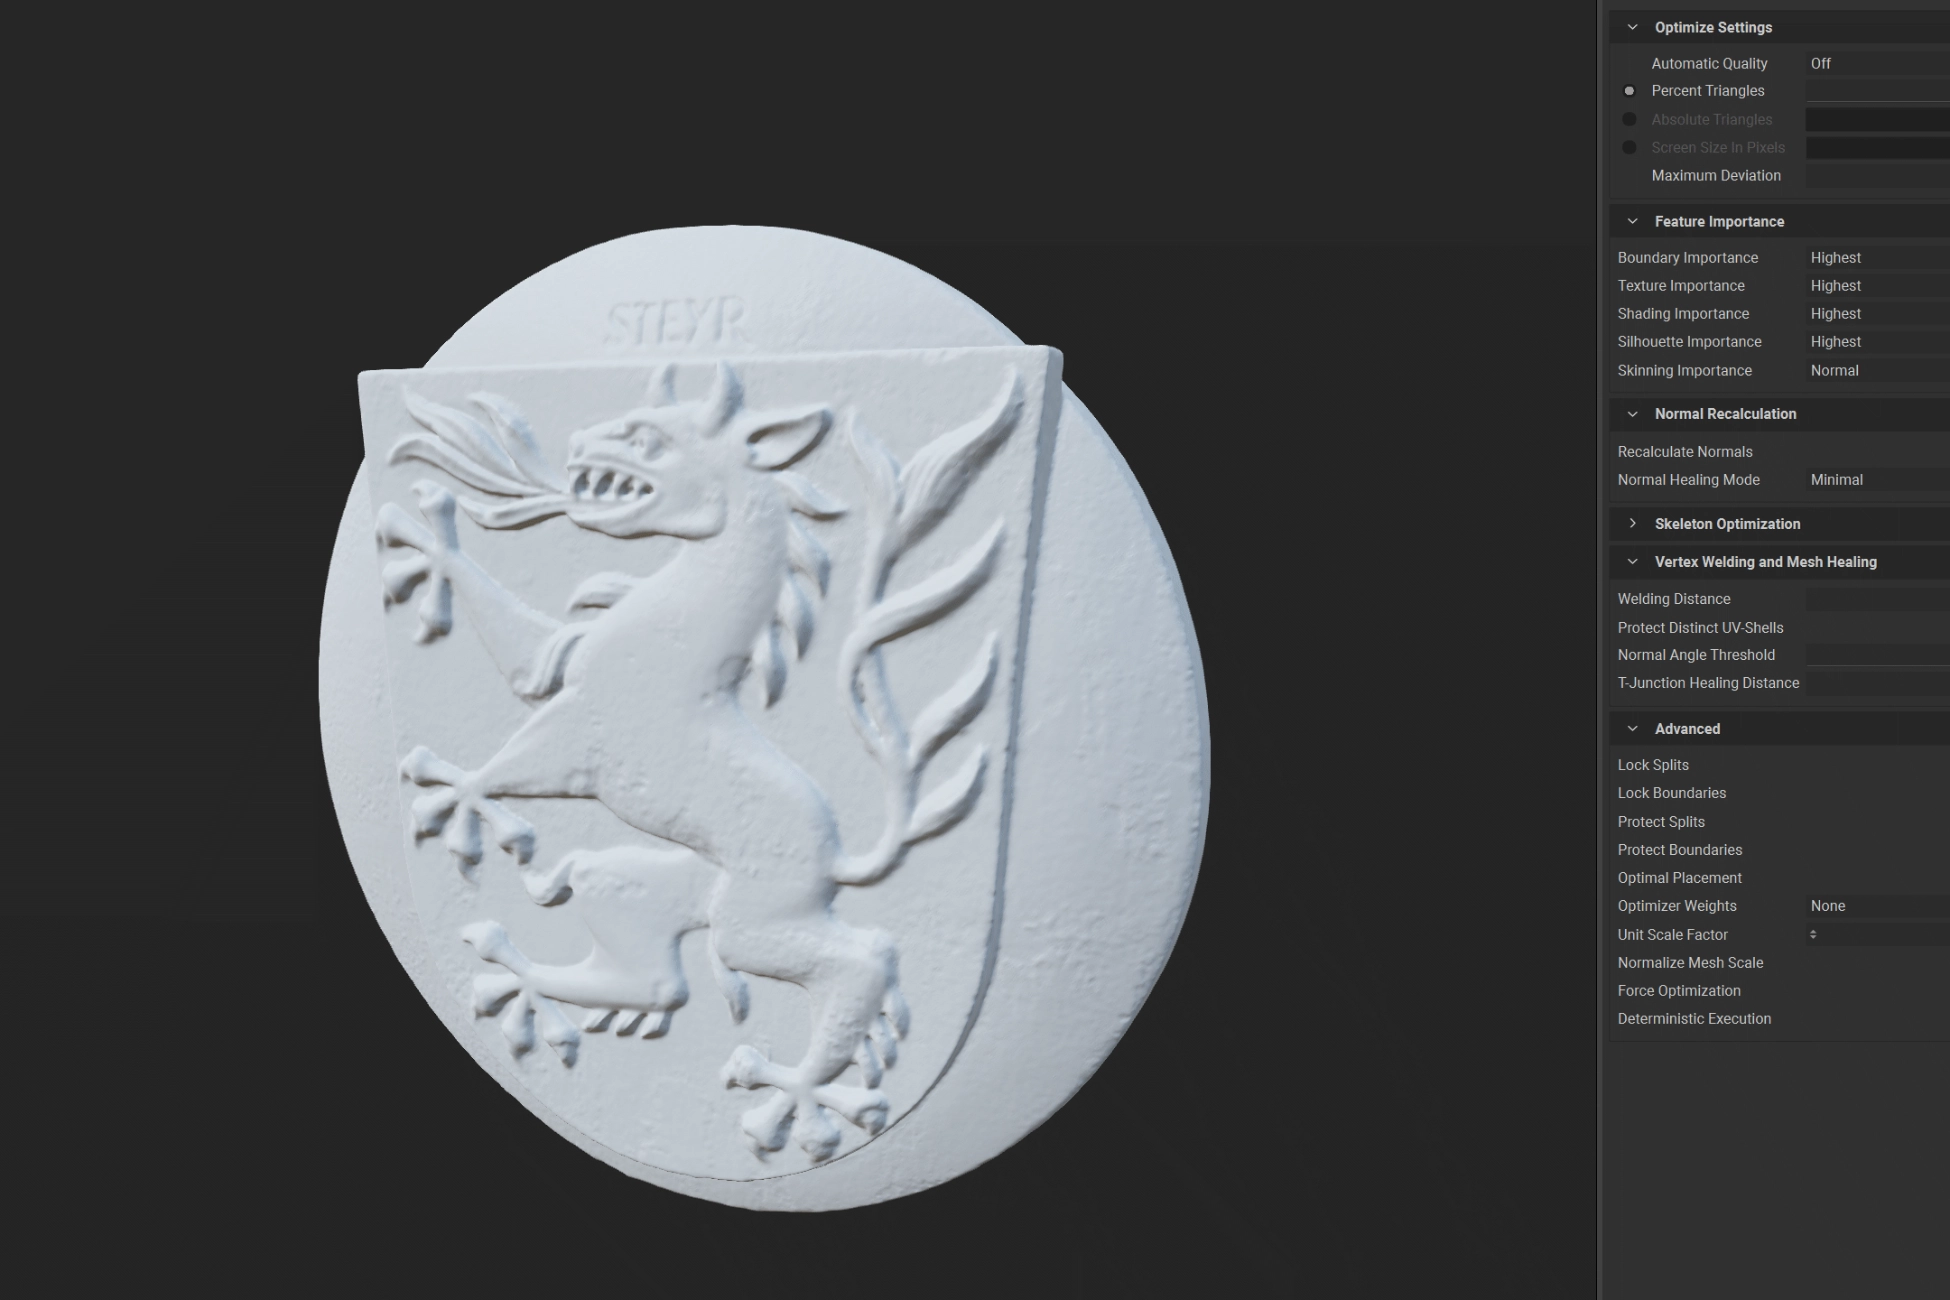
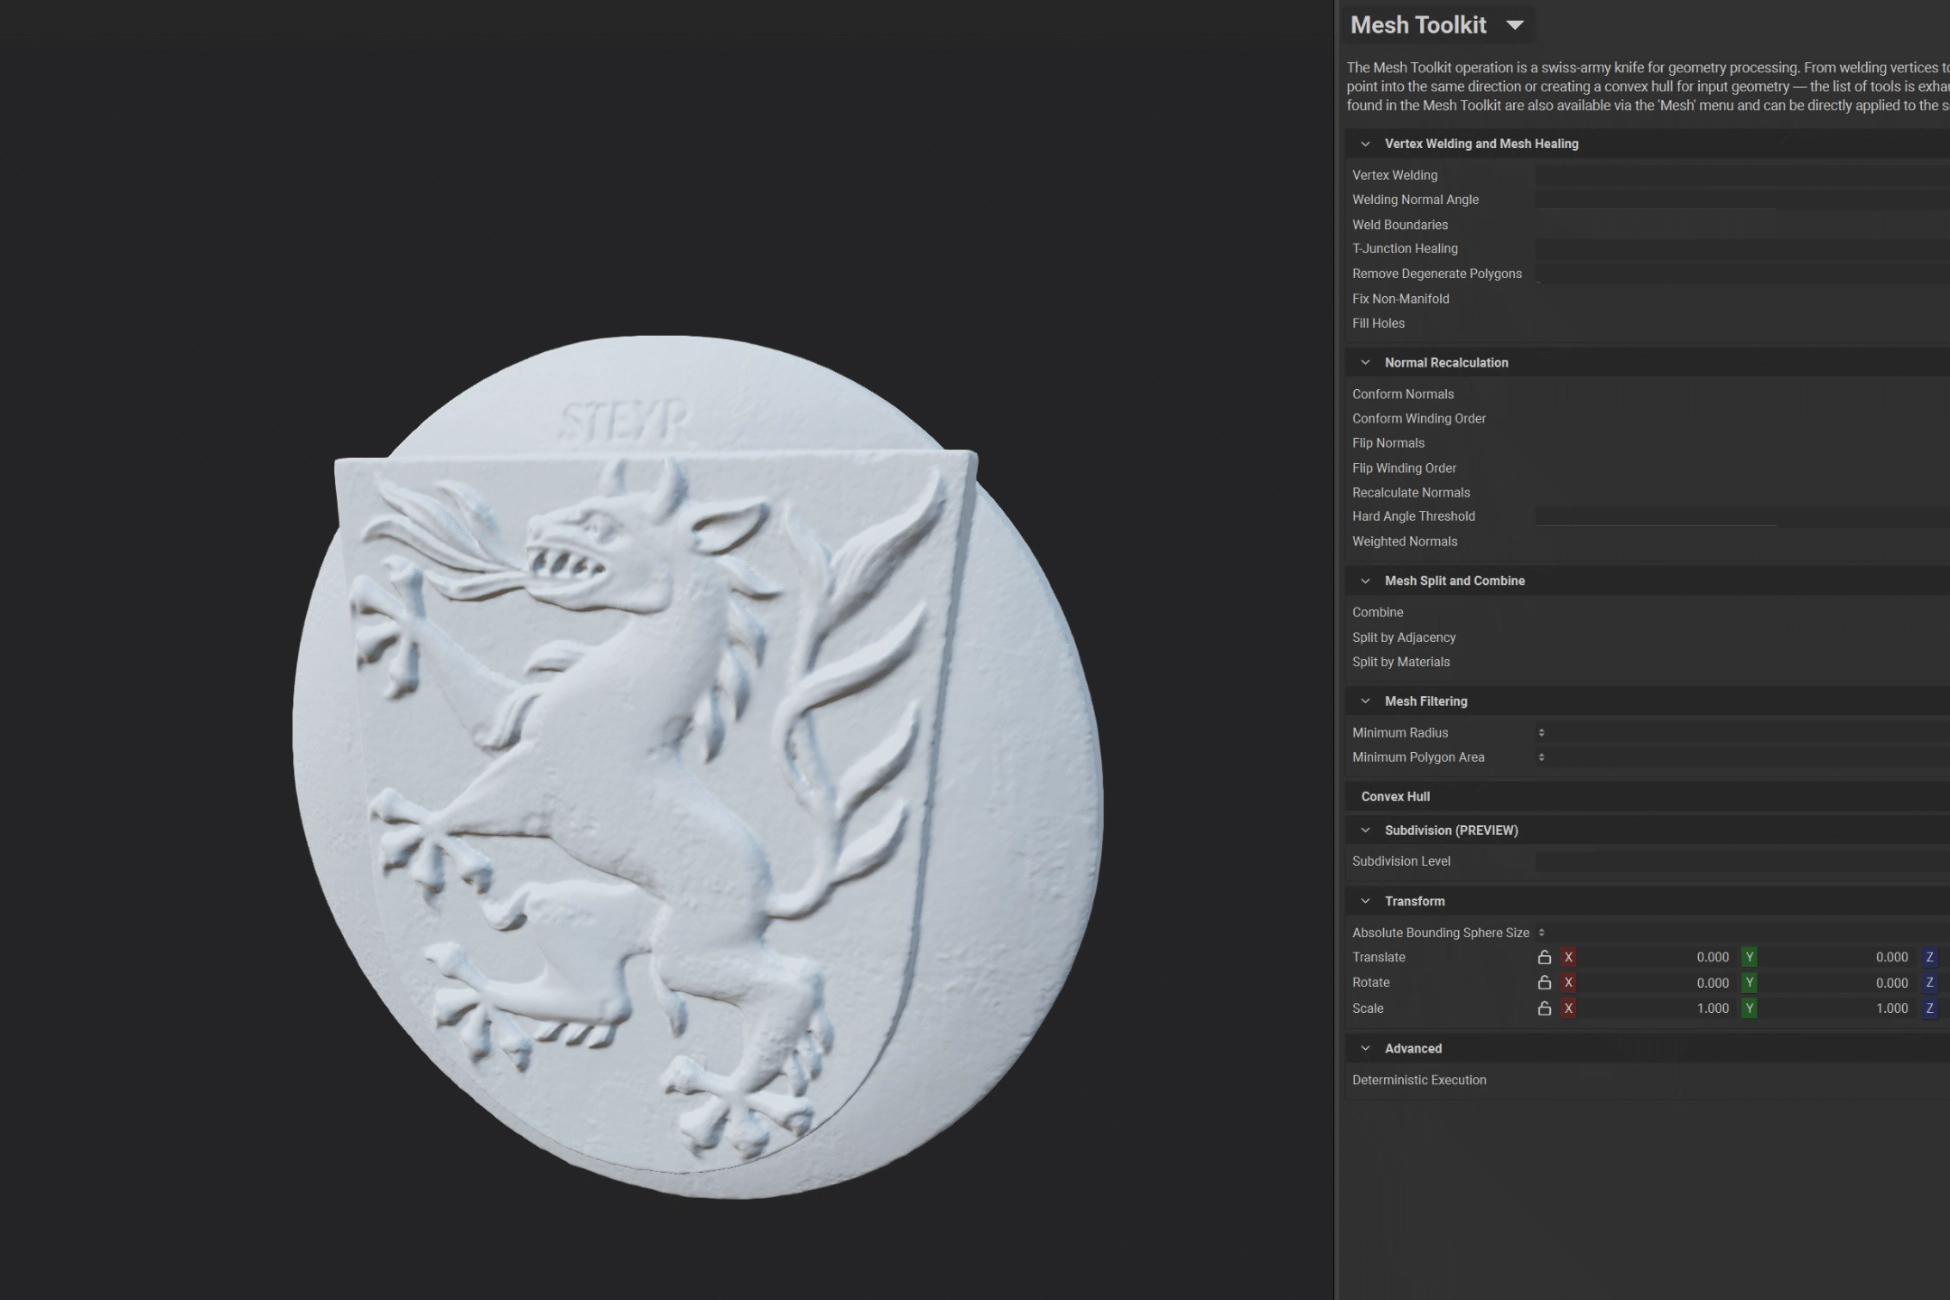
In the picture on the left is the final optimized mesh where the mesh is cleaner, more evenly distributed and free from major artifacts that could affect later stages.
TIP: Always double-check the triangle distribution during the optimization process. Even distribution helps avoid stretching during UV mapping and ensures a smoother texture application.
UV UNWRAPPING
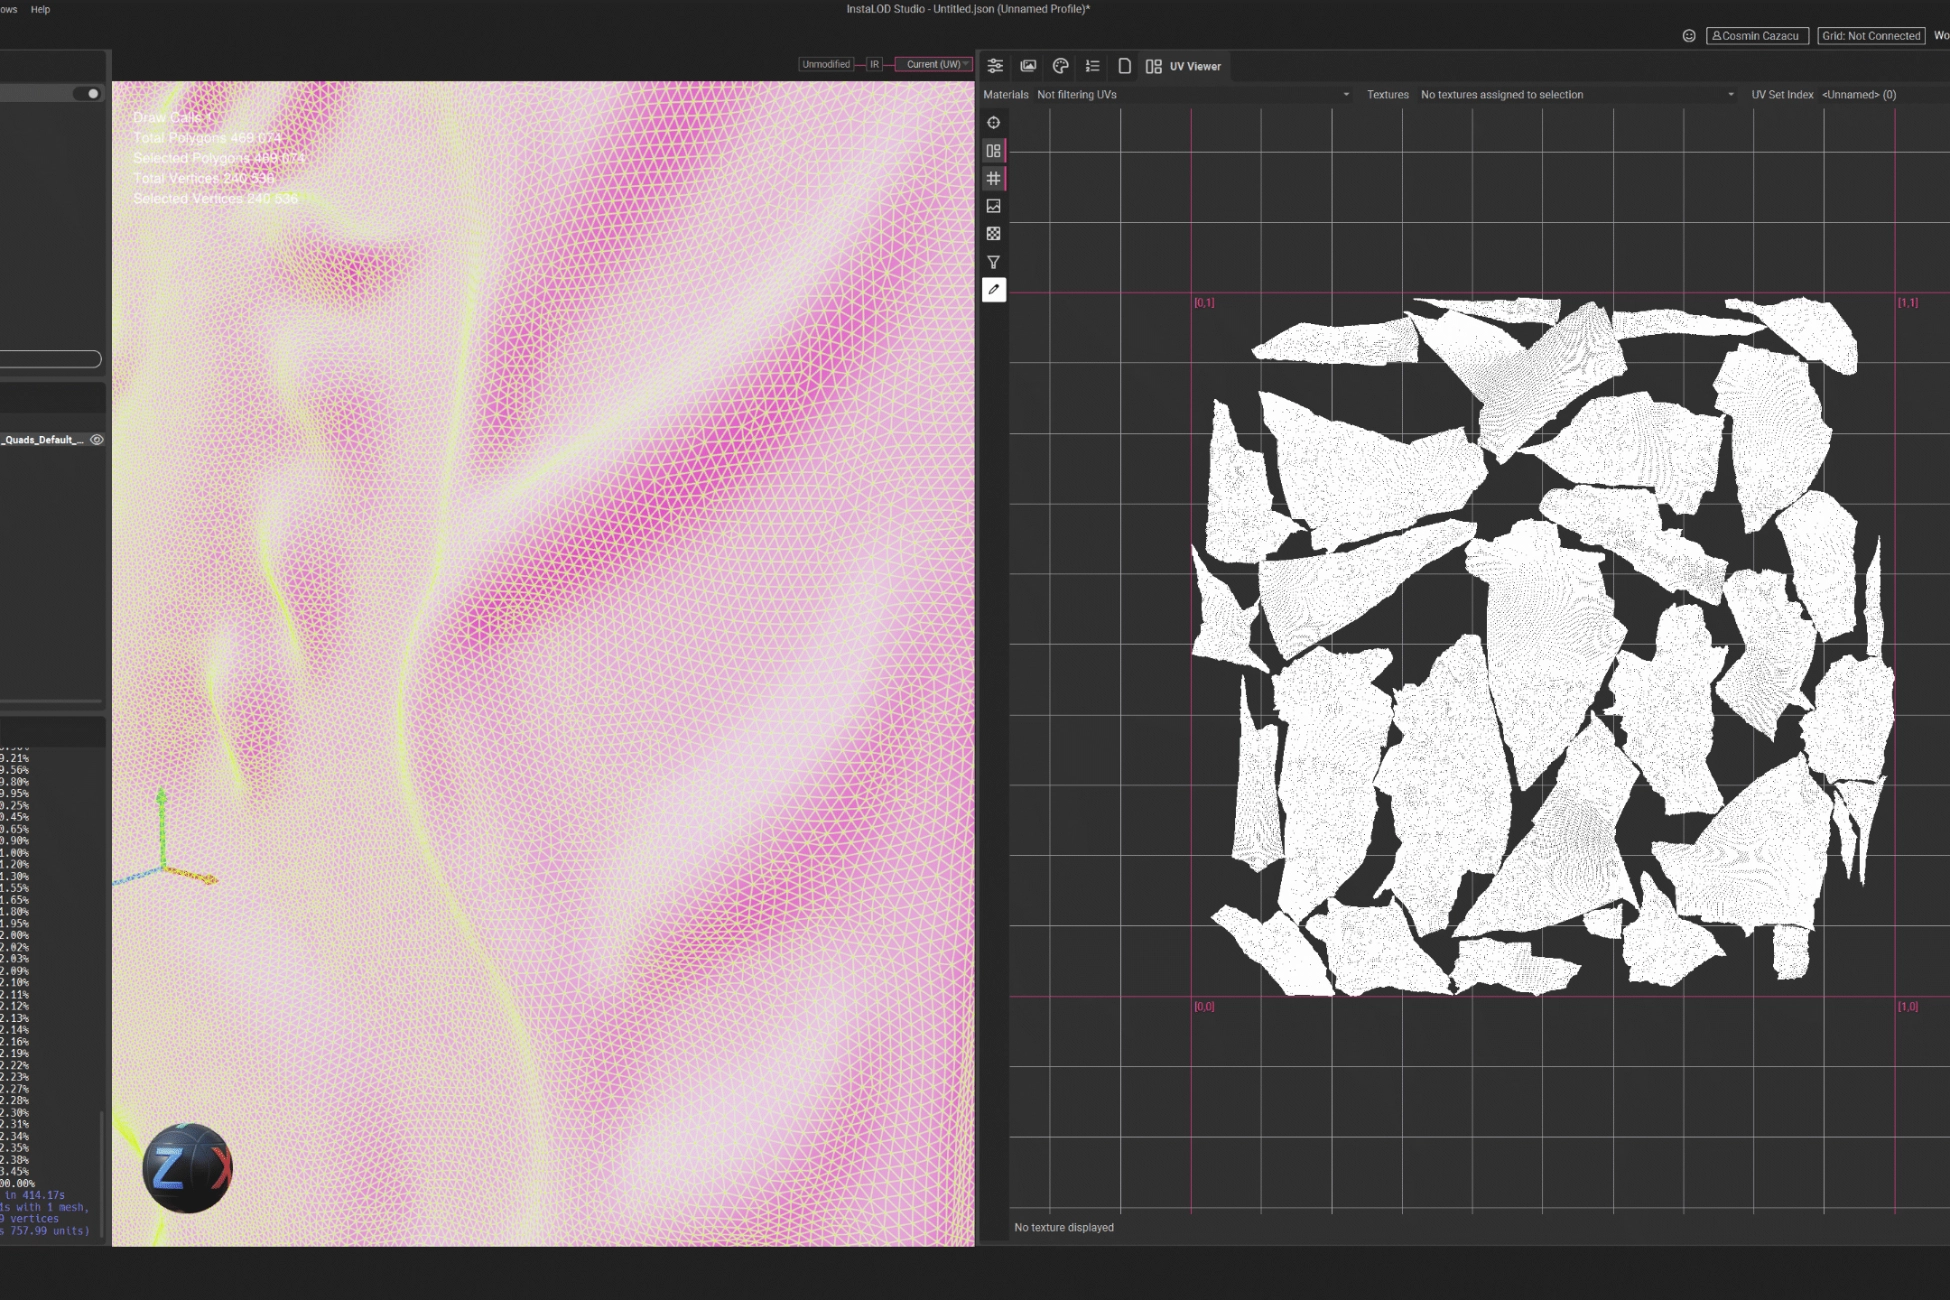
Once the raw scan is optimized, it’s time to unwrap the mesh and prepare it for texturing. InstaLOD offers a solid starting point by generating decent UVs automatically, clean enough to move forward, but still leaving room for refinement.
For the final LOD0, which serves as the foundation for all texture work, we take these UVs a step further. Using RizomUV, we optimize island placement and orientation, ensuring efficient use of texture space while maintaining consistent texel density across all UV islands. This guarantees cleaner bakes, uniform detail across the asset, and fewer issues down the line.
Once we’ve finalized our UVs, the mesh is ready for the next step: generating LODs using InstaLOD’s robust simplification tools.
TIP: Keep an eye on texel density using checker patterns. Uniform scale across UV islands helps prevent blurry or stretched textures during baking and rendering.

LODS
Generating LODs (Levels of Detail) is an essential step for performance-optimized assets—especially for real-time engines or large-scale scenes. In InstaLOD, this is handled using the Optimize operation, which simplifies the mesh step-by-step—typically reducing polygon count by 50% per LOD level.
However, don’t push the reduction too far – aggressive simplification can distort your mesh and introduce artifacts, especially around fine details or silhouette edges.
A key setting to keep in mind is Maximum Deviation. This controls how closely the simplified mesh follows the original. A value between 0.2 and 1 usually strikes a good balance between visual fidelity and performance. Feel free to experiment with this, each asset might respond differently depending on its complexity.
TIP: Don’t just rely on polygon percentage reduction. Always evaluate the visual deviation from your original mesh. A cleaner silhouette often matters more than saving a few extra triangles.
TIP: Not every asset needs LODs. If an object is already under 1K triangles or barely visible in scenes, LODs may just add unnecessary complexity and memory usage.
TIP: Ensure your LODs maintain consistent pivot points and world scale. This avoids snapping issues or visual popping when swapping between levels in-engine.
REPROJECTION

For the reprojection phase, I typically generate two versions of the mesh in RealityCapture: one using the standard settings, and another using high-detail settings — the latter will serve as our baking reference. Once we import the LOD0 mesh (previously unwrapped and optimized via InstaLOD and RizomUV), RealityCapture handles the texture reprojection with ease.
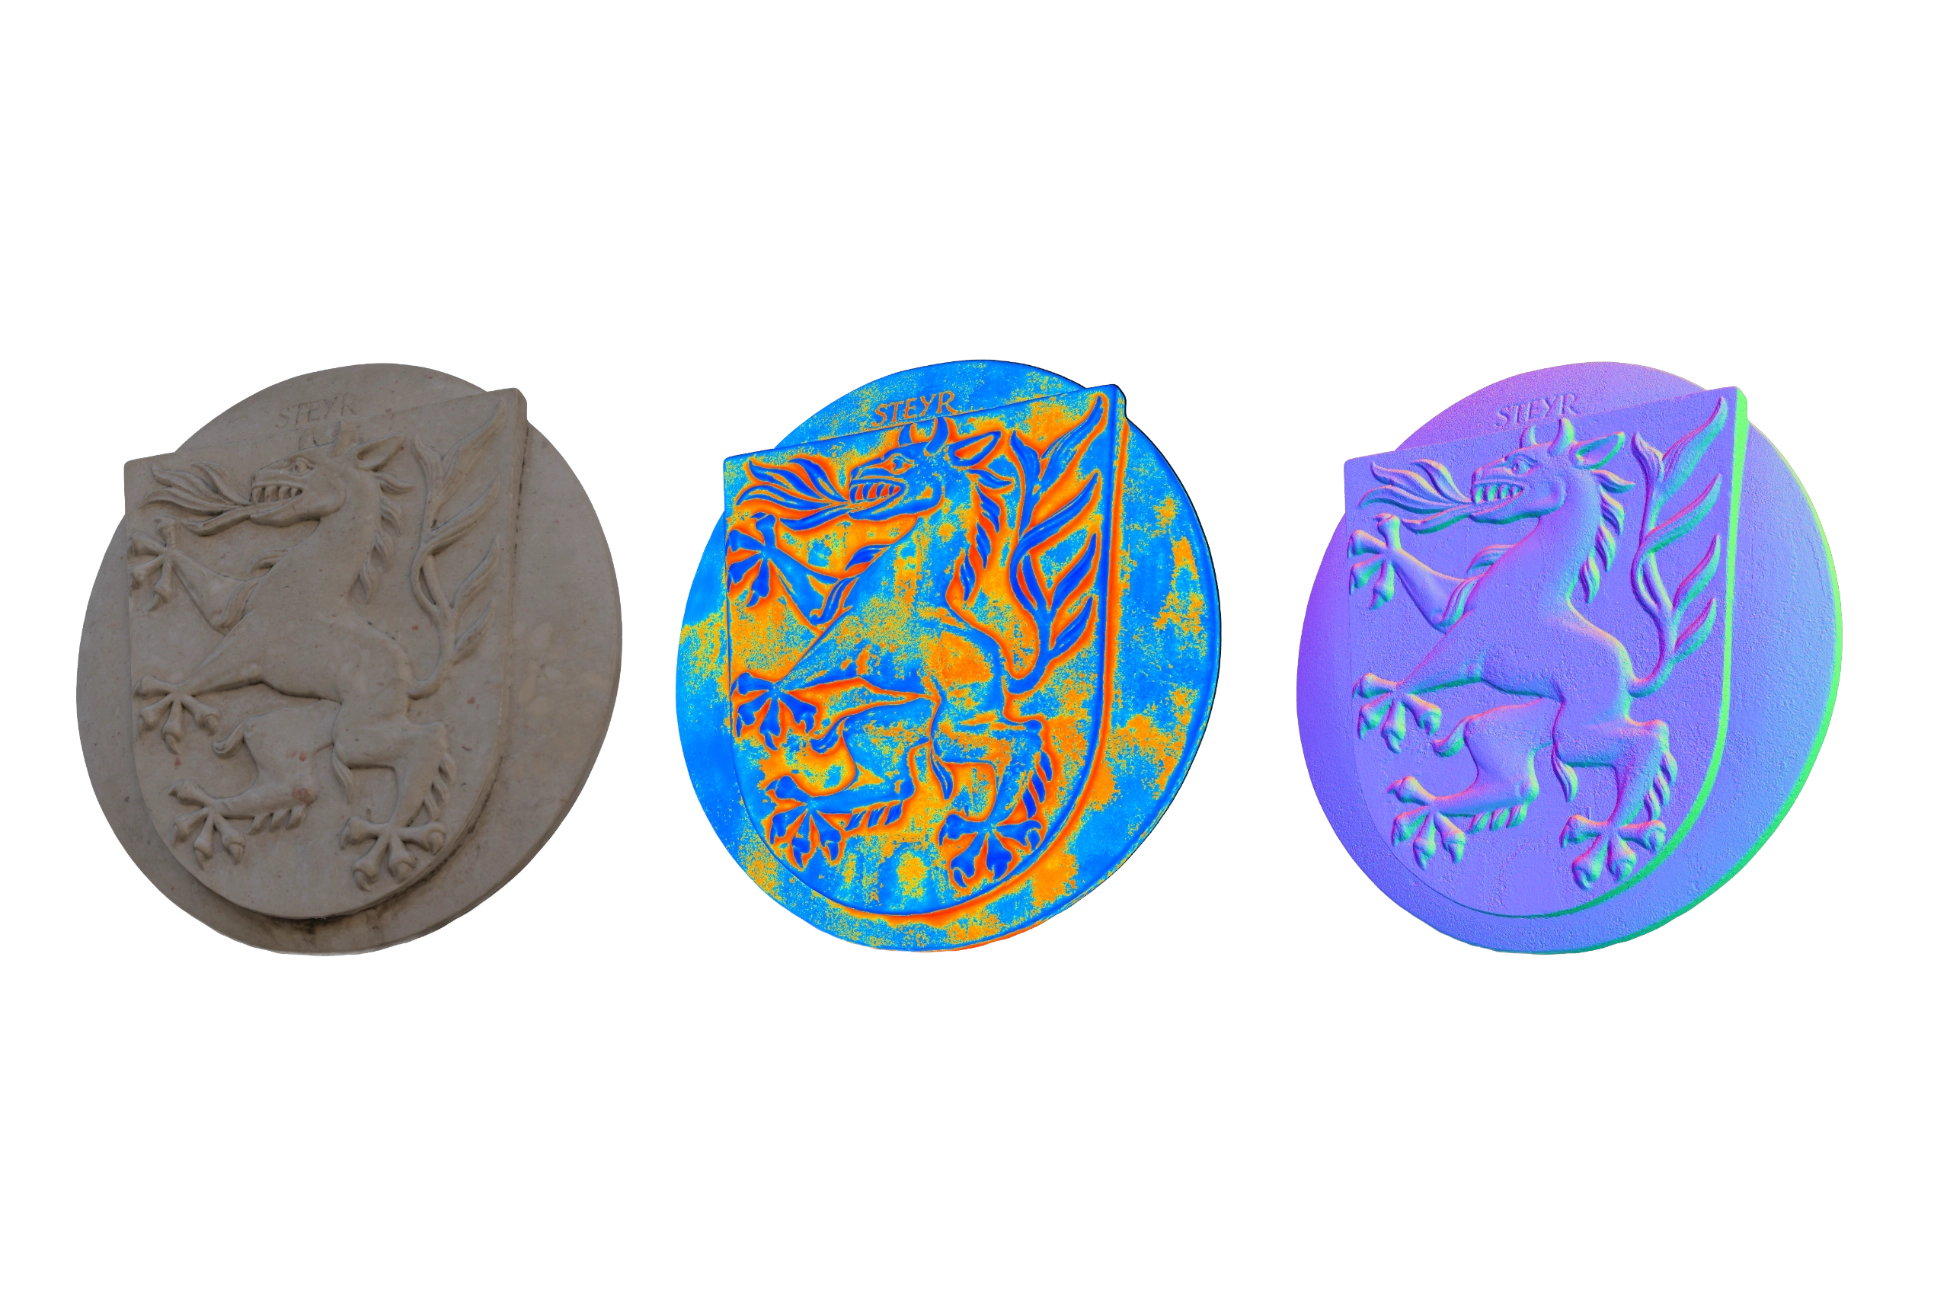
On the right, you can see the final texture maps, including the displacement, normal, and diffuse maps. If you notice red areas in the displacement map — don’t panic! These indicate areas where the geometry is pushing inward or outward relative to the high-poly scan. It’s completely normal and expected within RealityCapture’s baking workflow.
TIP: Always use a high-detail mesh for baking. While it may take longer to process, it ensures that finer details, like surface imperfections and subtle nuances, are captured in the final textures.
ROUGHNESS
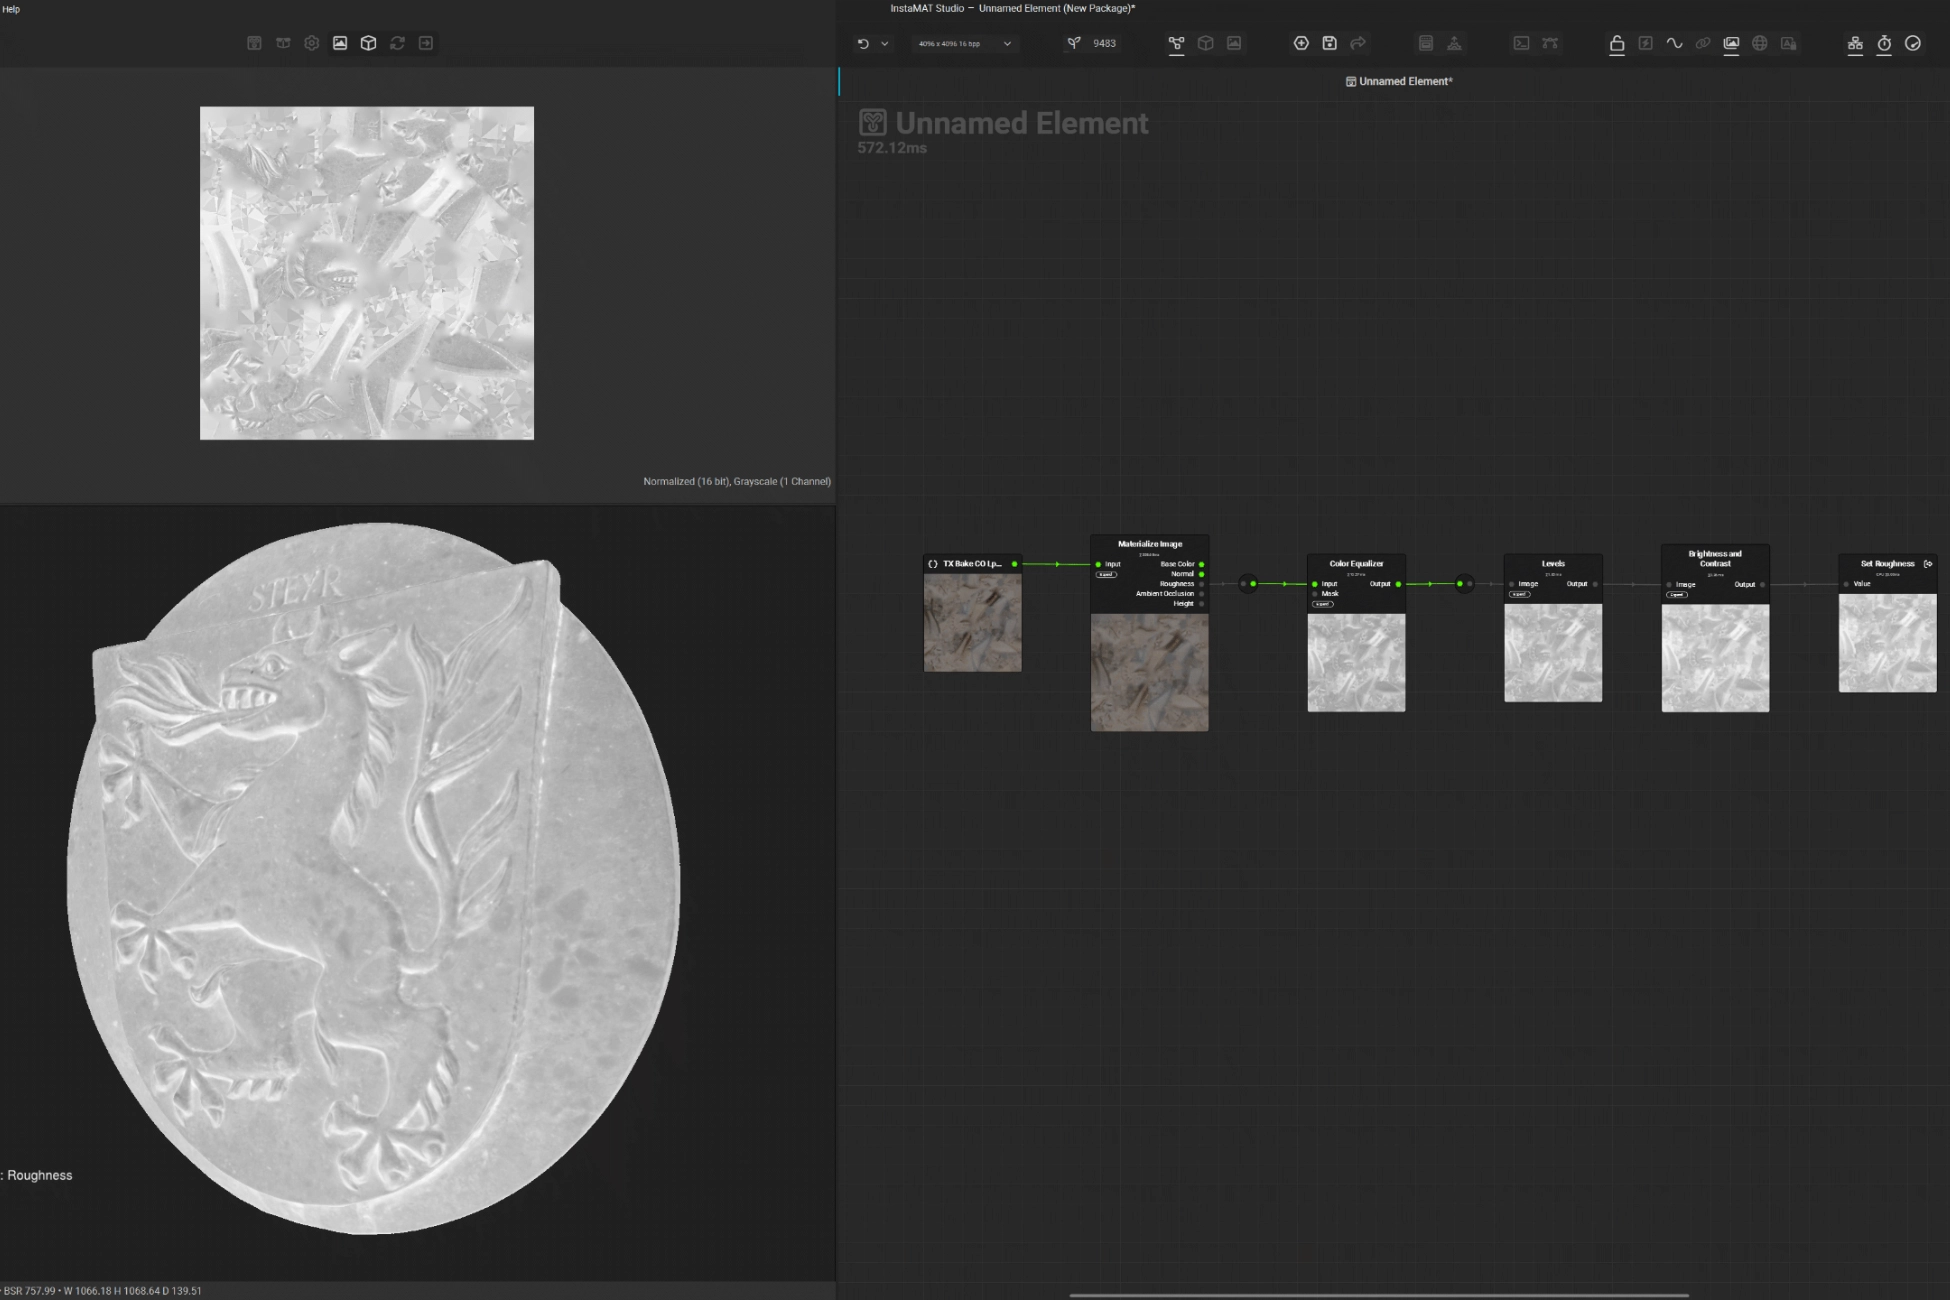
Now, here’s where things get interesting. There are several approaches to generating a roughness map, and it often starts by analyzing the albedo and studying reference photos to understand how the object reacts to light in real life. For this step I use InstaMAT (which is the by far the most promising alternative to the whole Adobe suite) – you can check it out here.
To begin generating the roughness map, I use the Materialize Image node in InstaMAT to create a base roughness map. From here, I work through a series of adjustment nodes. Sometimes, I’ll incorporate additional maps like dust or dirt roughness and mix them in to add complexity and variation to the texture. The image above shows a basic roughness setup in InstaMAT, but the final graph can look significantly more complex depending on the object.
The roughness map is one of the most important maps in an asset, as it conveys how the surface interacts with different lighting conditions. A well-crafted roughness map helps achieve more accurate, realistic renders, making it a key step in the texturing pipeline.
More information about InstaMAT nodes and pipeline integrations can be found here.
TIP: Start from the albedo, but don’t trust it blindly. Albedo values can hint at material properties, but always reference real-world lighting photos or PBR scans to get an accurate feel for how rough or glossy the surface truly is.
TIP: When fine-tuning roughness, remember that 0.5 (mid-gray) represents a natural starting point. Push brighter for matte areas and darker for glossy ones, but always avoid going to extremes unless necessary.
TIP: Even the cleanest surfaces have micro-variations. Use grunge masks, ambient occlusion, or curvature maps to subtly break up your roughness.
TEXTURING
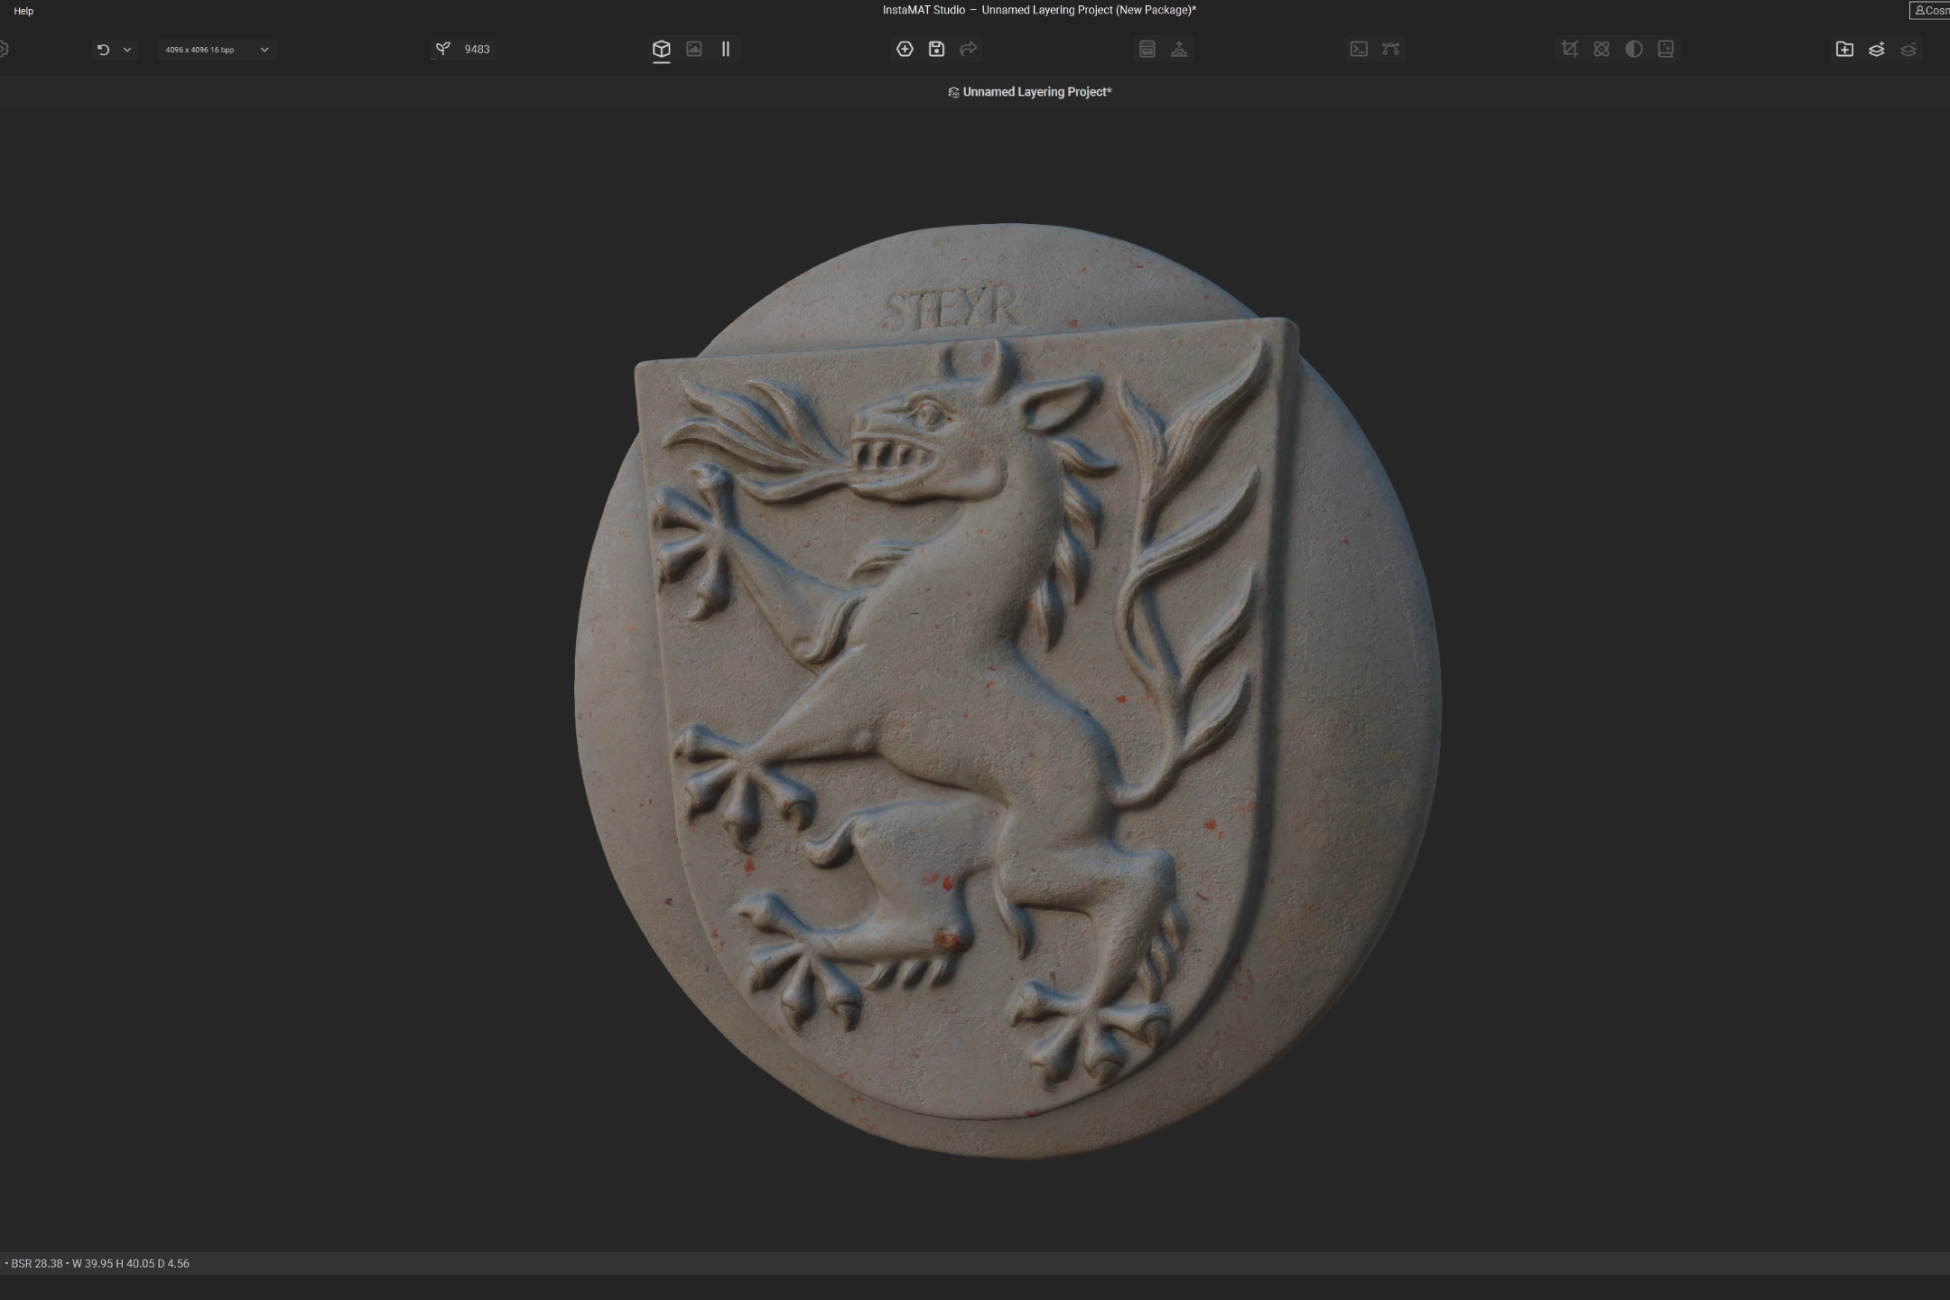
This stage is arguably the most satisfying part of the entire process. For texturing, I typically use the LOD0 mesh as the base. Before starting the baking process, I run a quick pass in Blender to gently smooth out the high-poly mesh using a soft brush. This helps reduce artifacts and potential baking issues when transferring detail onto the low-poly version.
its graph system allows for robust and flexible normal map baking workflows based on LODs. I’ll cover this process more deeply in a follow-up article focused entirely on baking in InstaMAT.
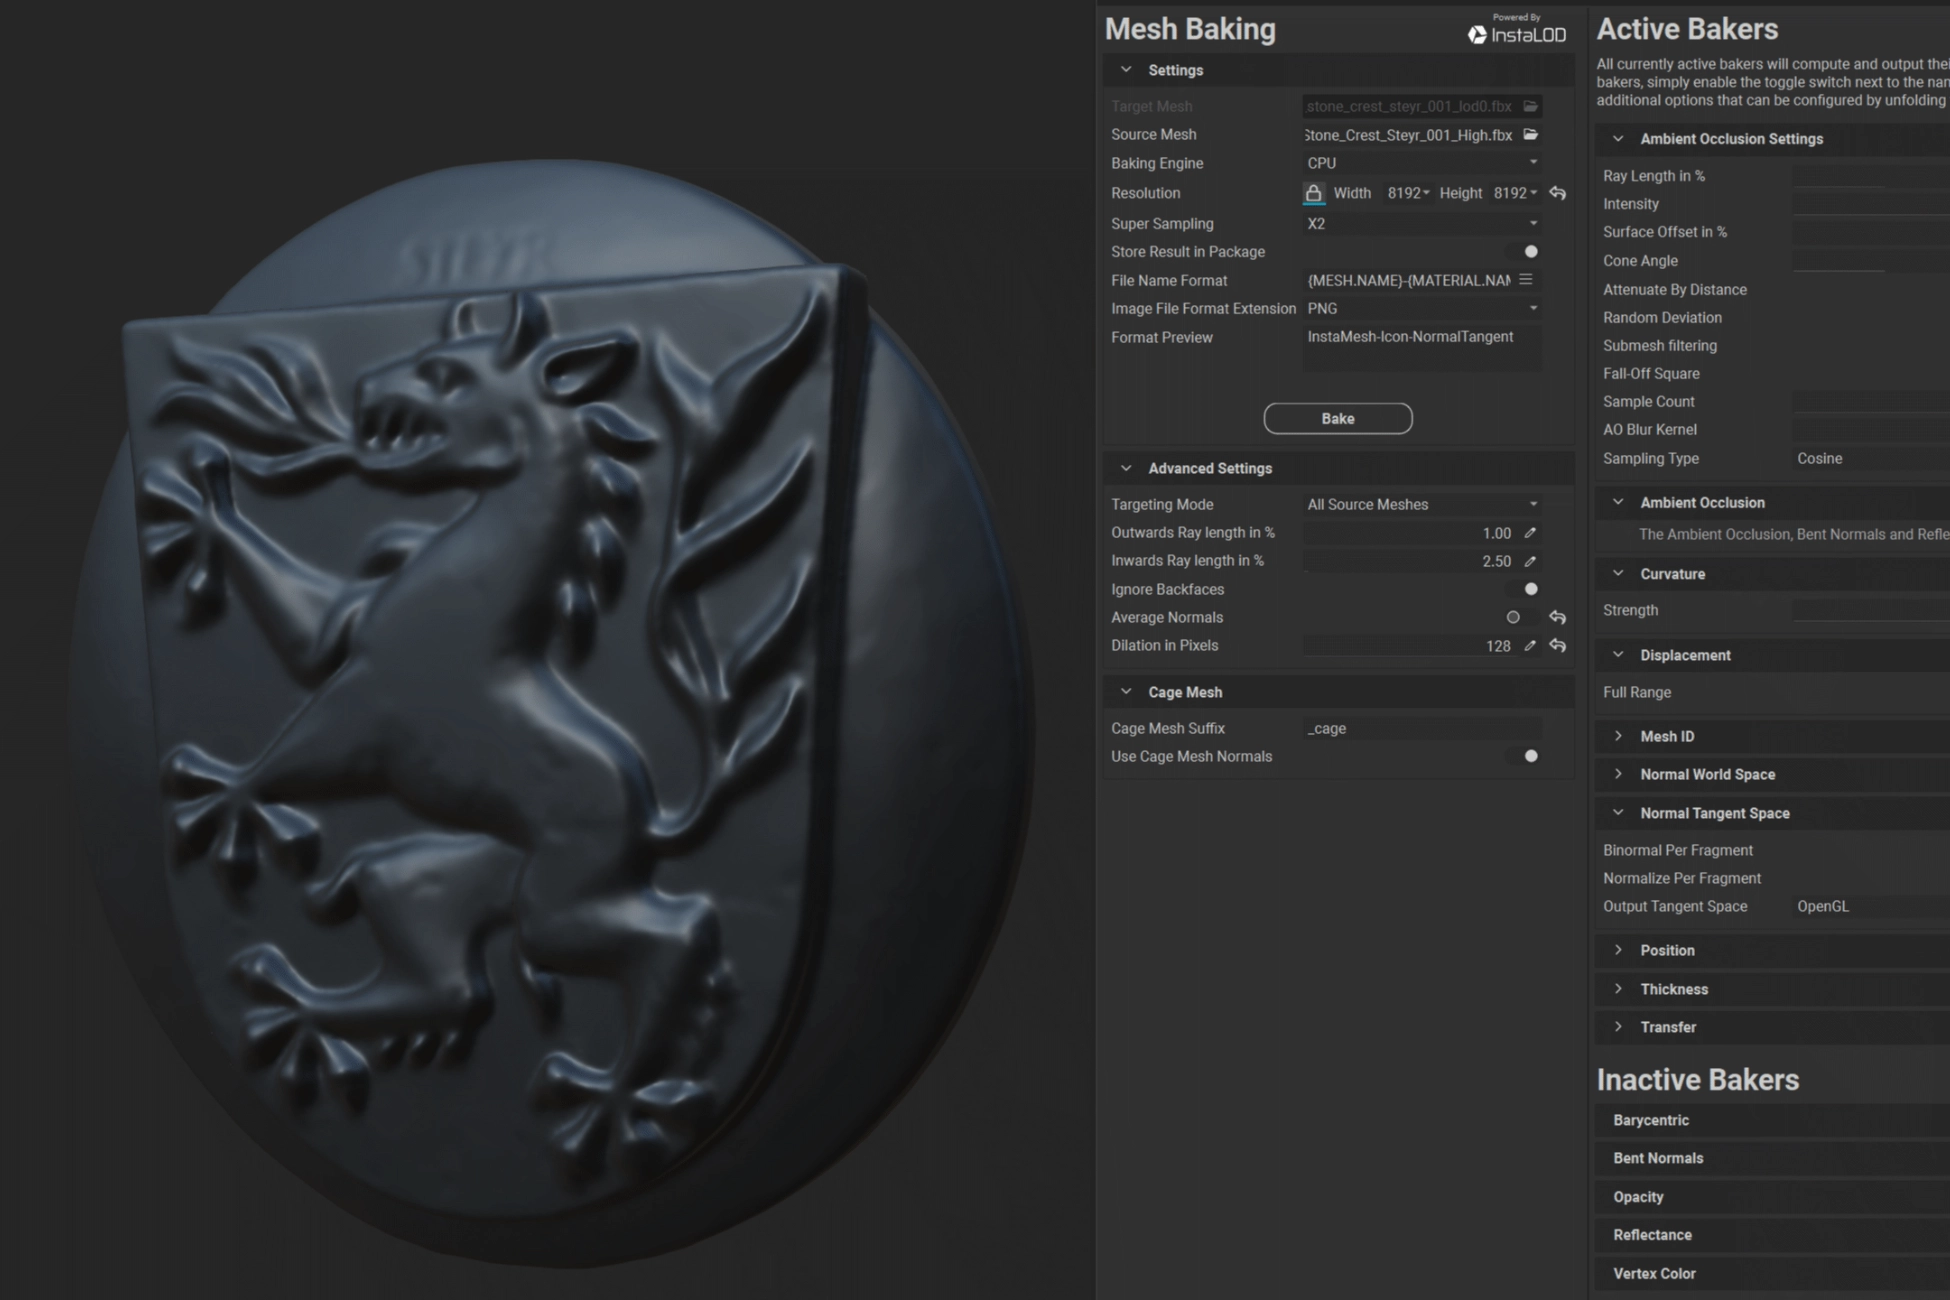
The goal here is to create a set of baked textures that faithfully represent the original high-resolution detail while minimizing the performance overhead. It’s always a balancing act between fidelity and optimization.
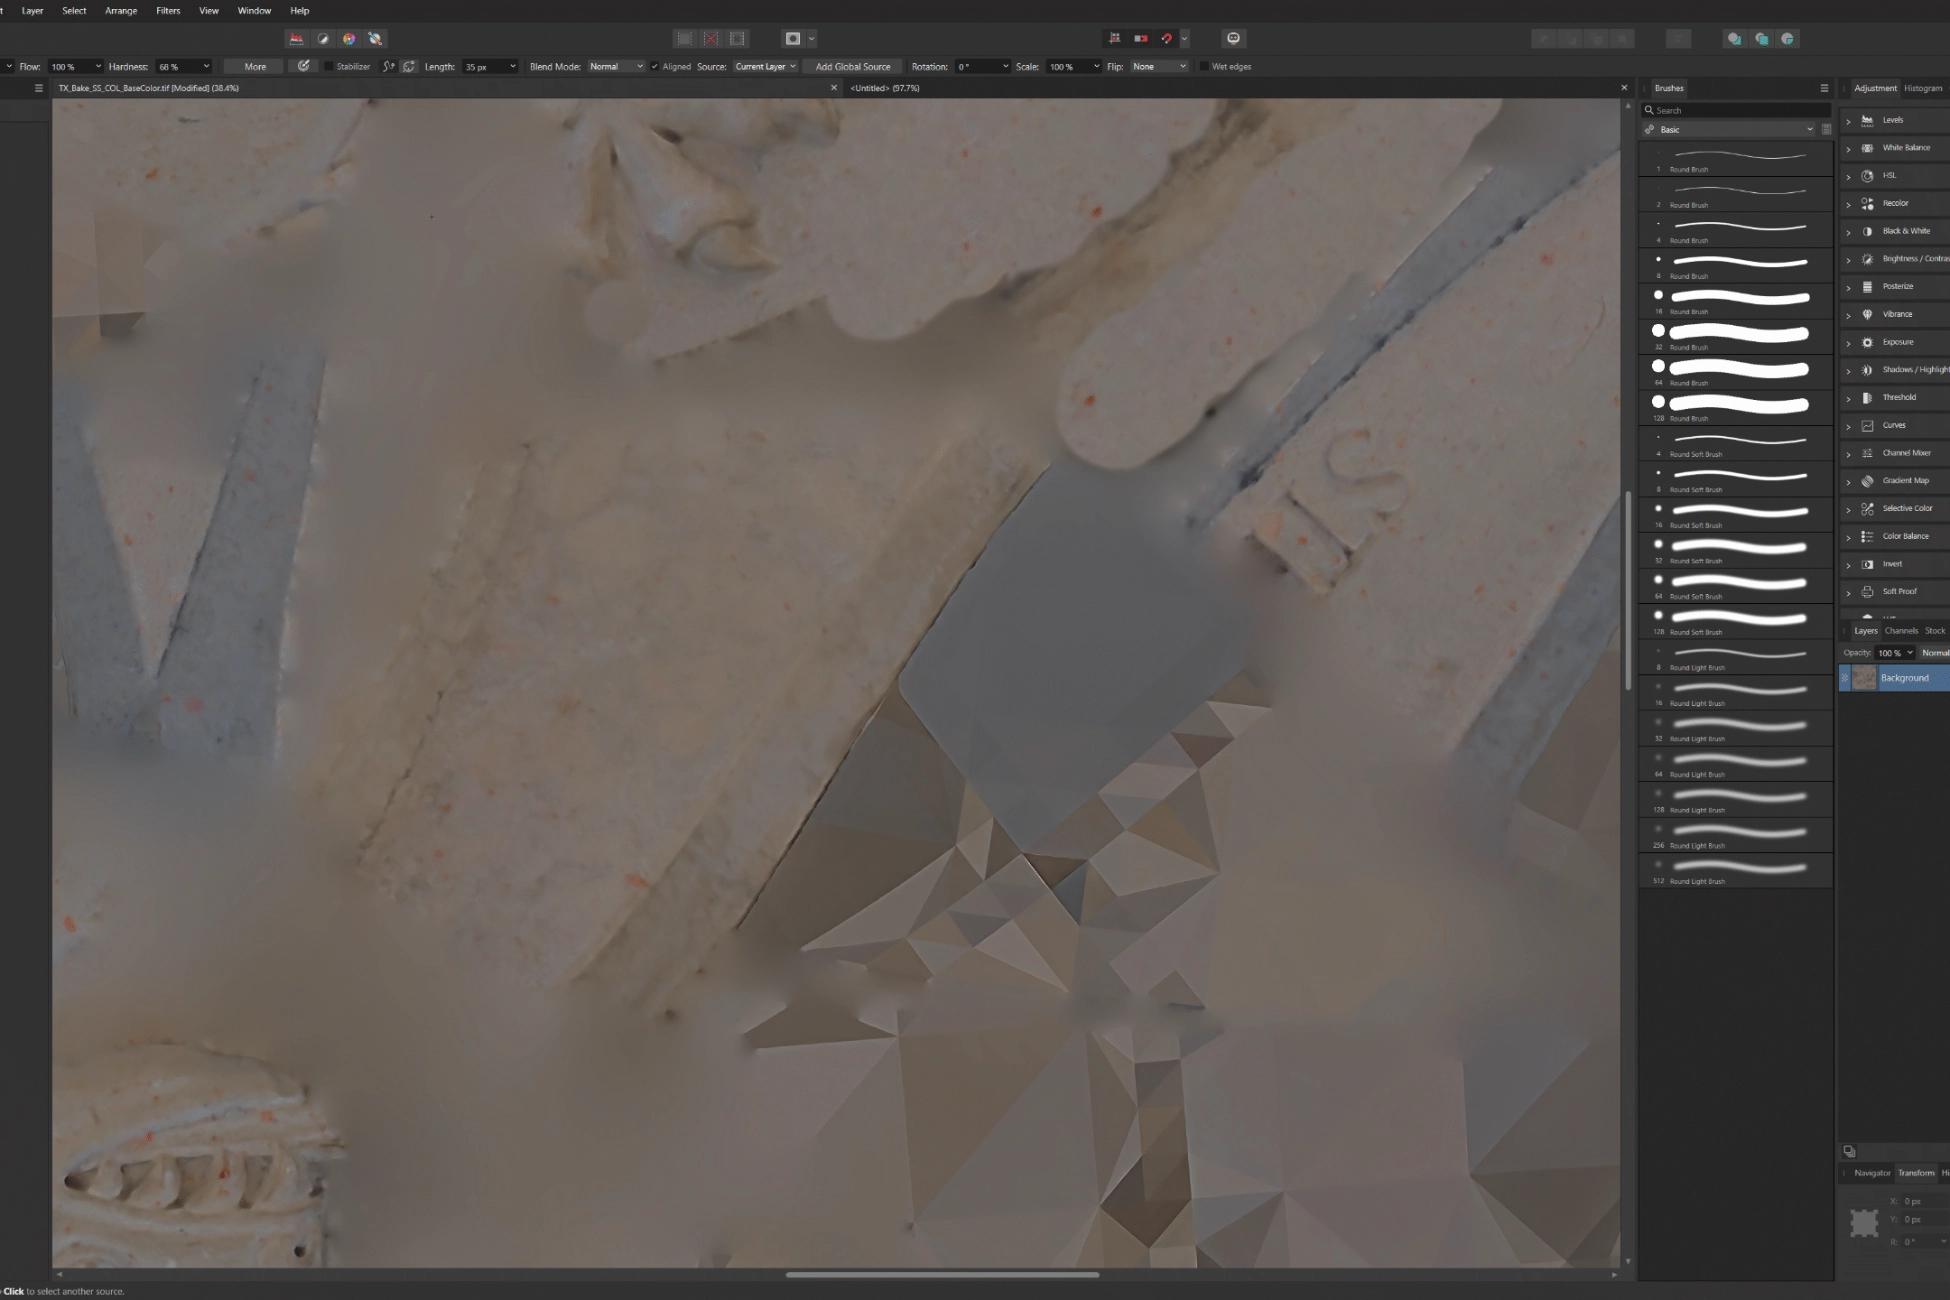
Even with perfect lighting or a cross-polarization filter, minor shadows can still sneak into your albedo map during reprojection. These can undermine the realism of your asset if not addressed. That’s why I always inspect the albedo in Affinity Photo and manually correct any unwanted shadows or projection artifacts.
POST PROCESSING
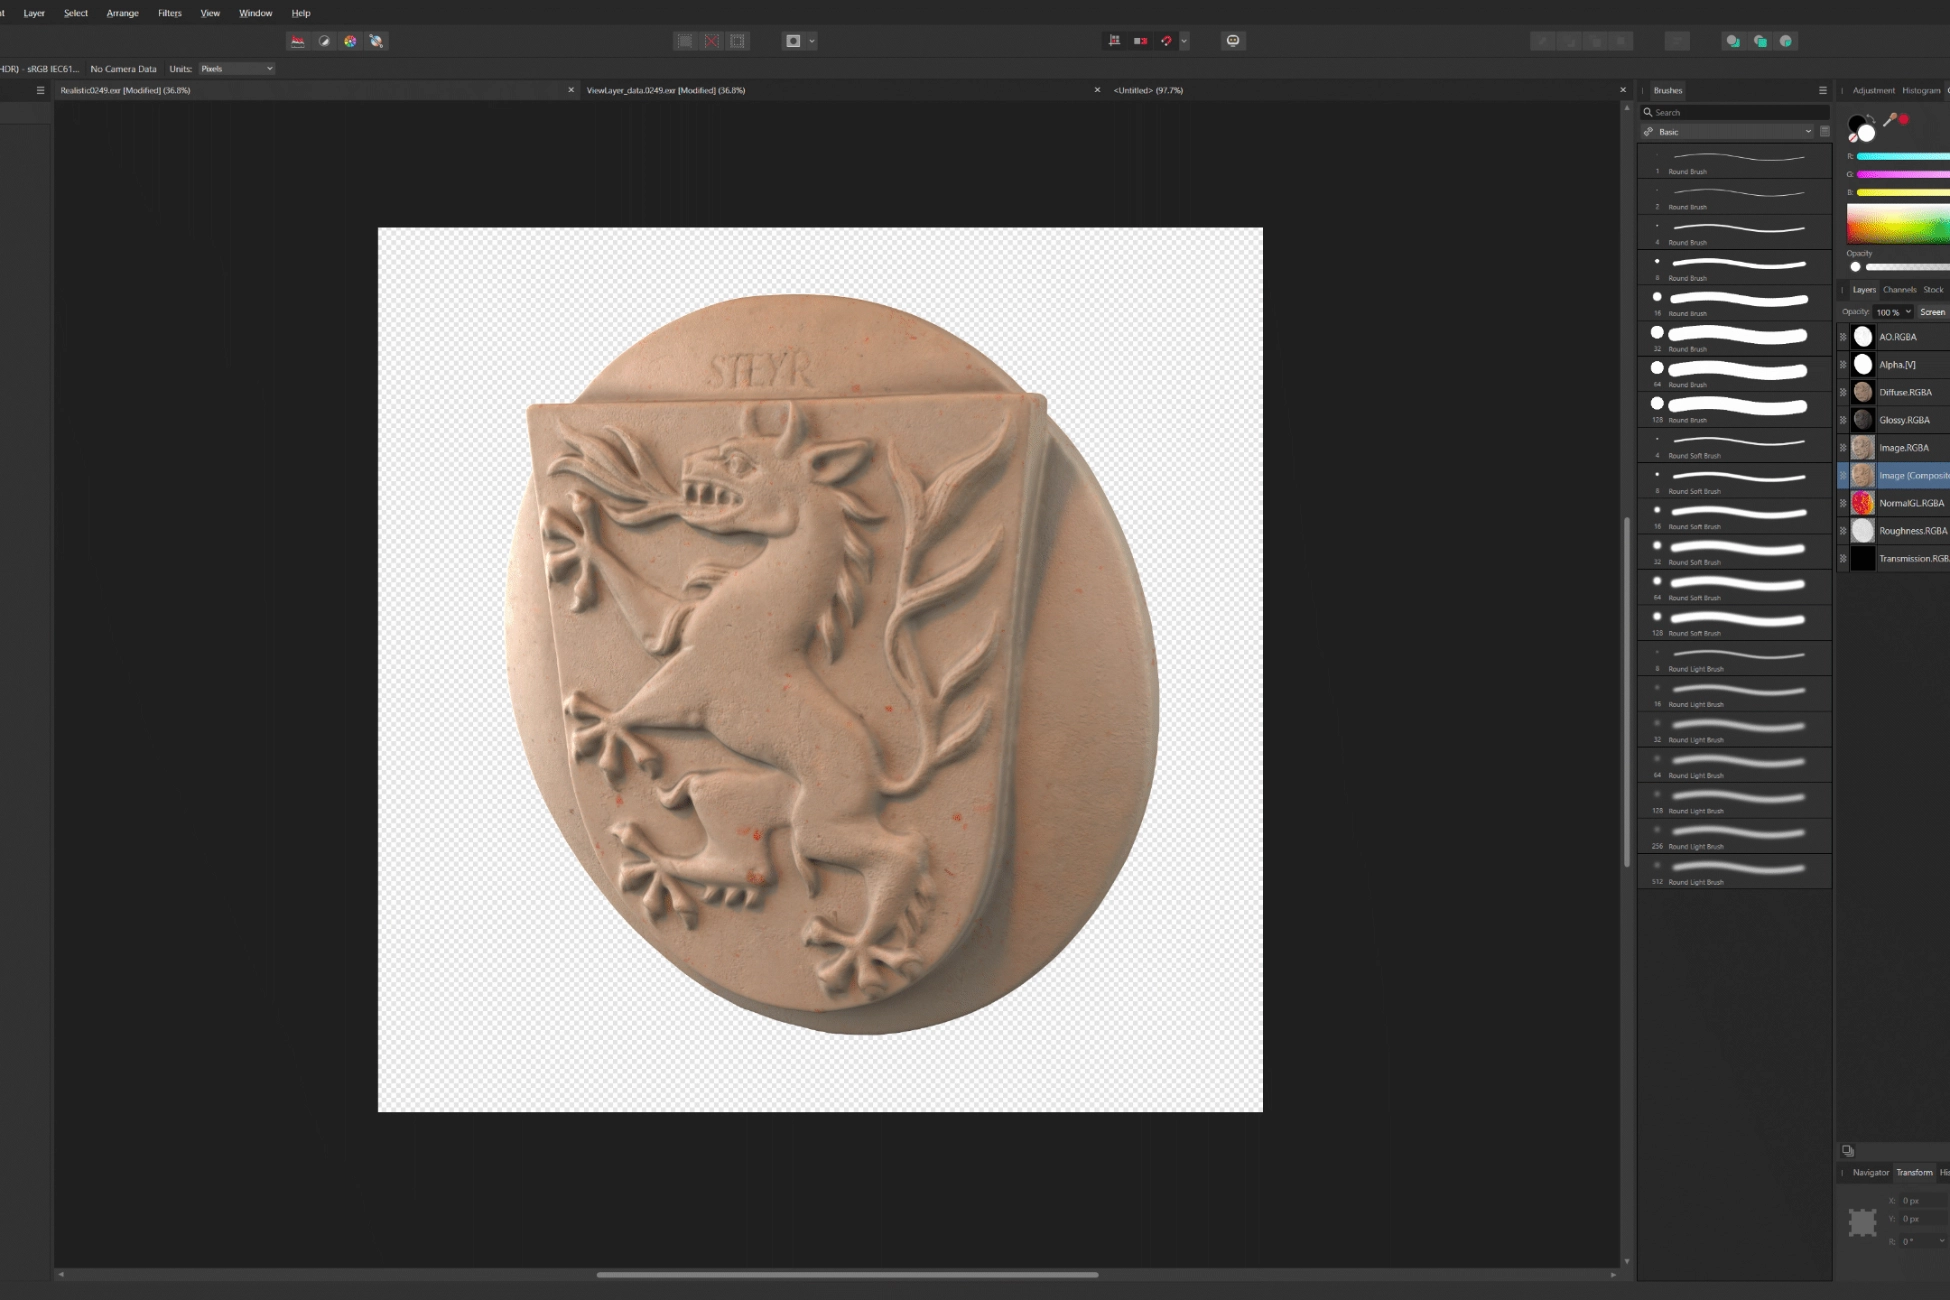
Once the texturing process in InstaMAT is complete, it’s time to prepare the asset for final presentation. All rendering and AOV (Arbitrary Output Variables) exports are handled inside Blender.
To manage render layers and passes efficiently, I use a fantastic plugin called Render Manager. It provides a clean, dedicated UI for handling render layers, passes, and exporting everything in a structured way, ideal for compositing workflows. You can grab the plugin from cgchannel.com.
Get it from here.
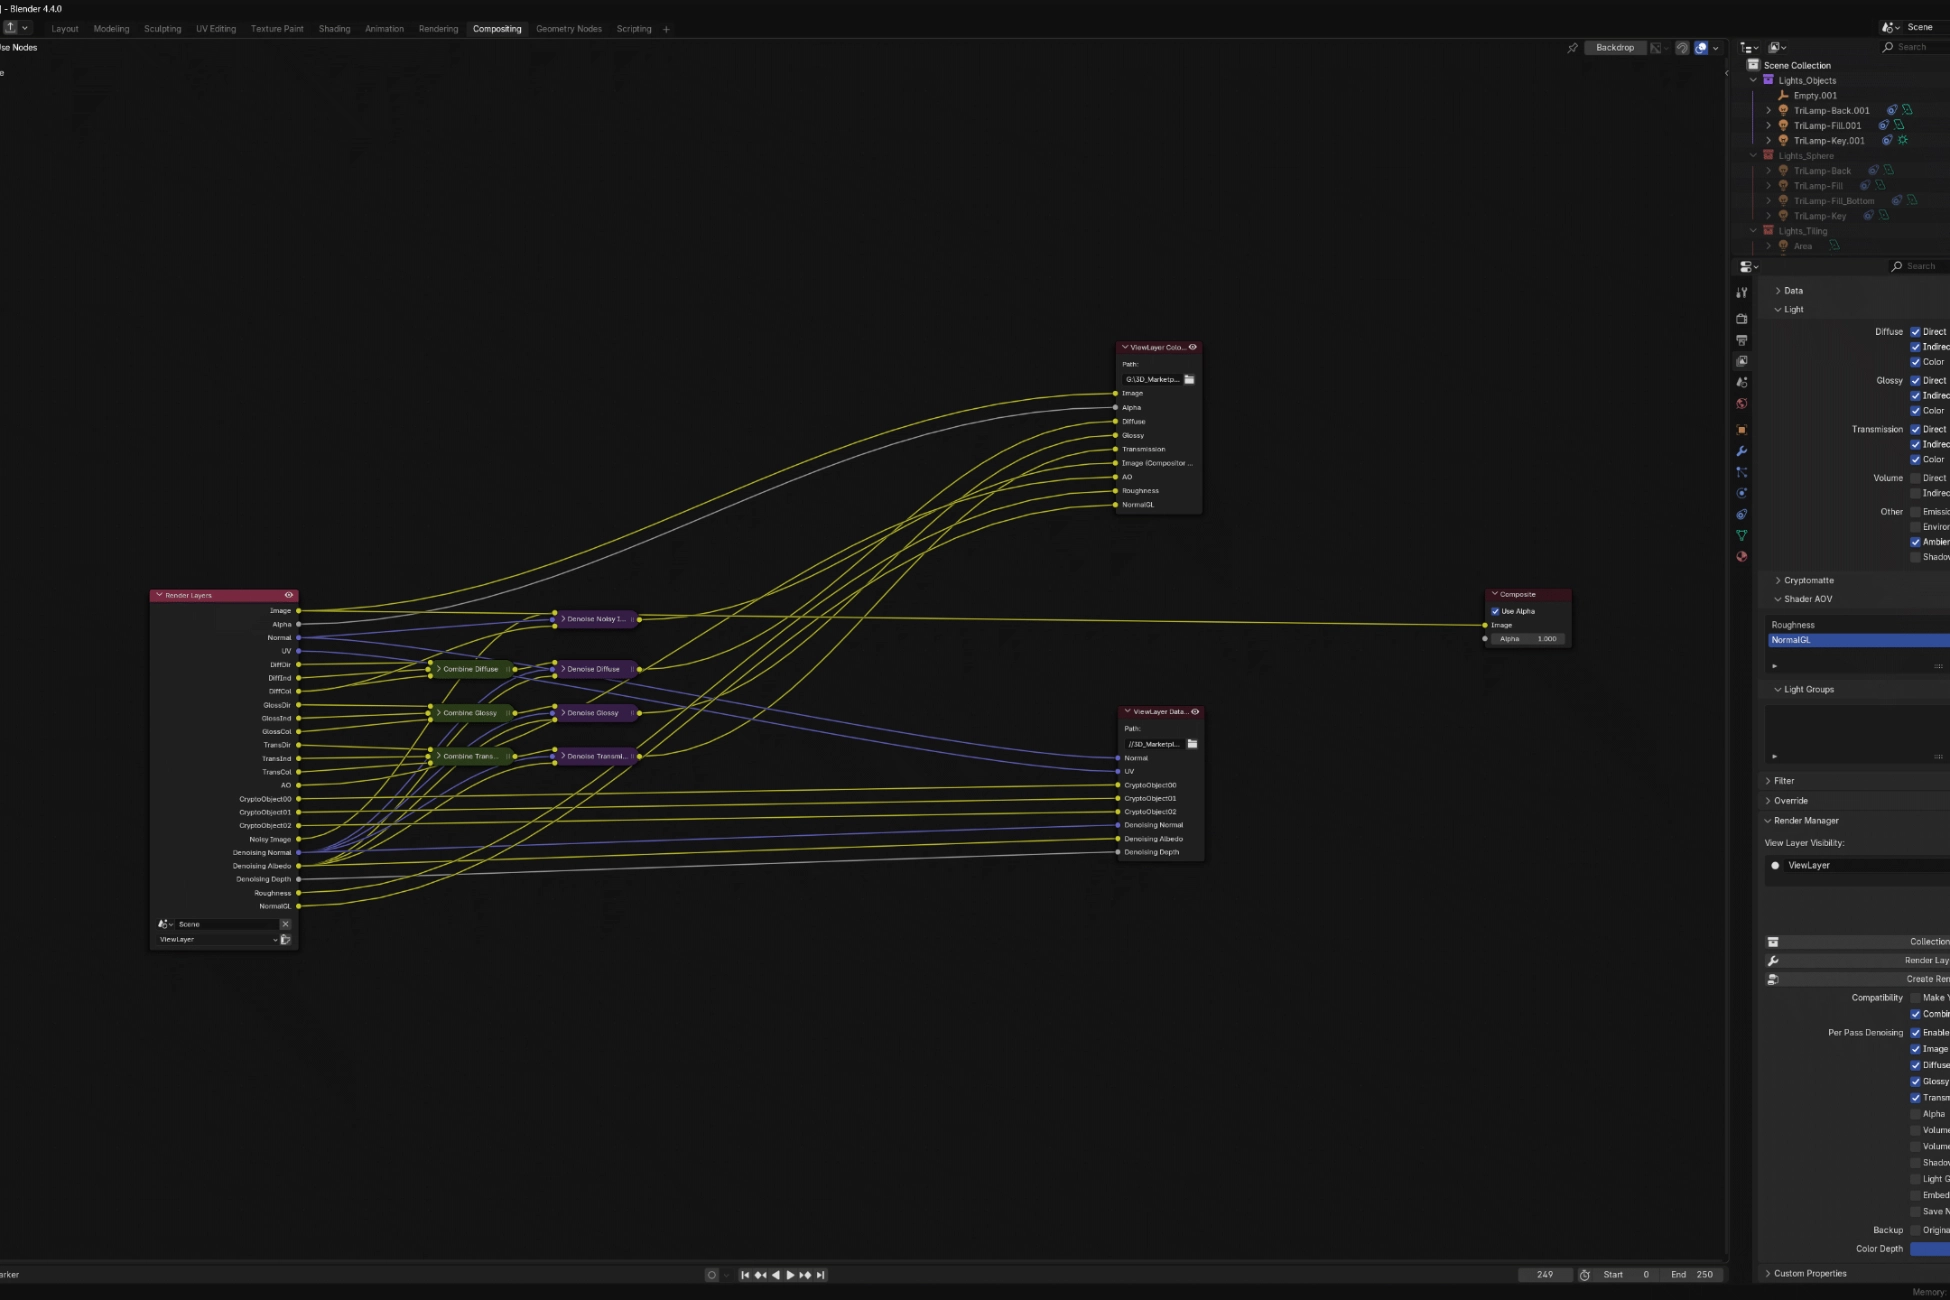
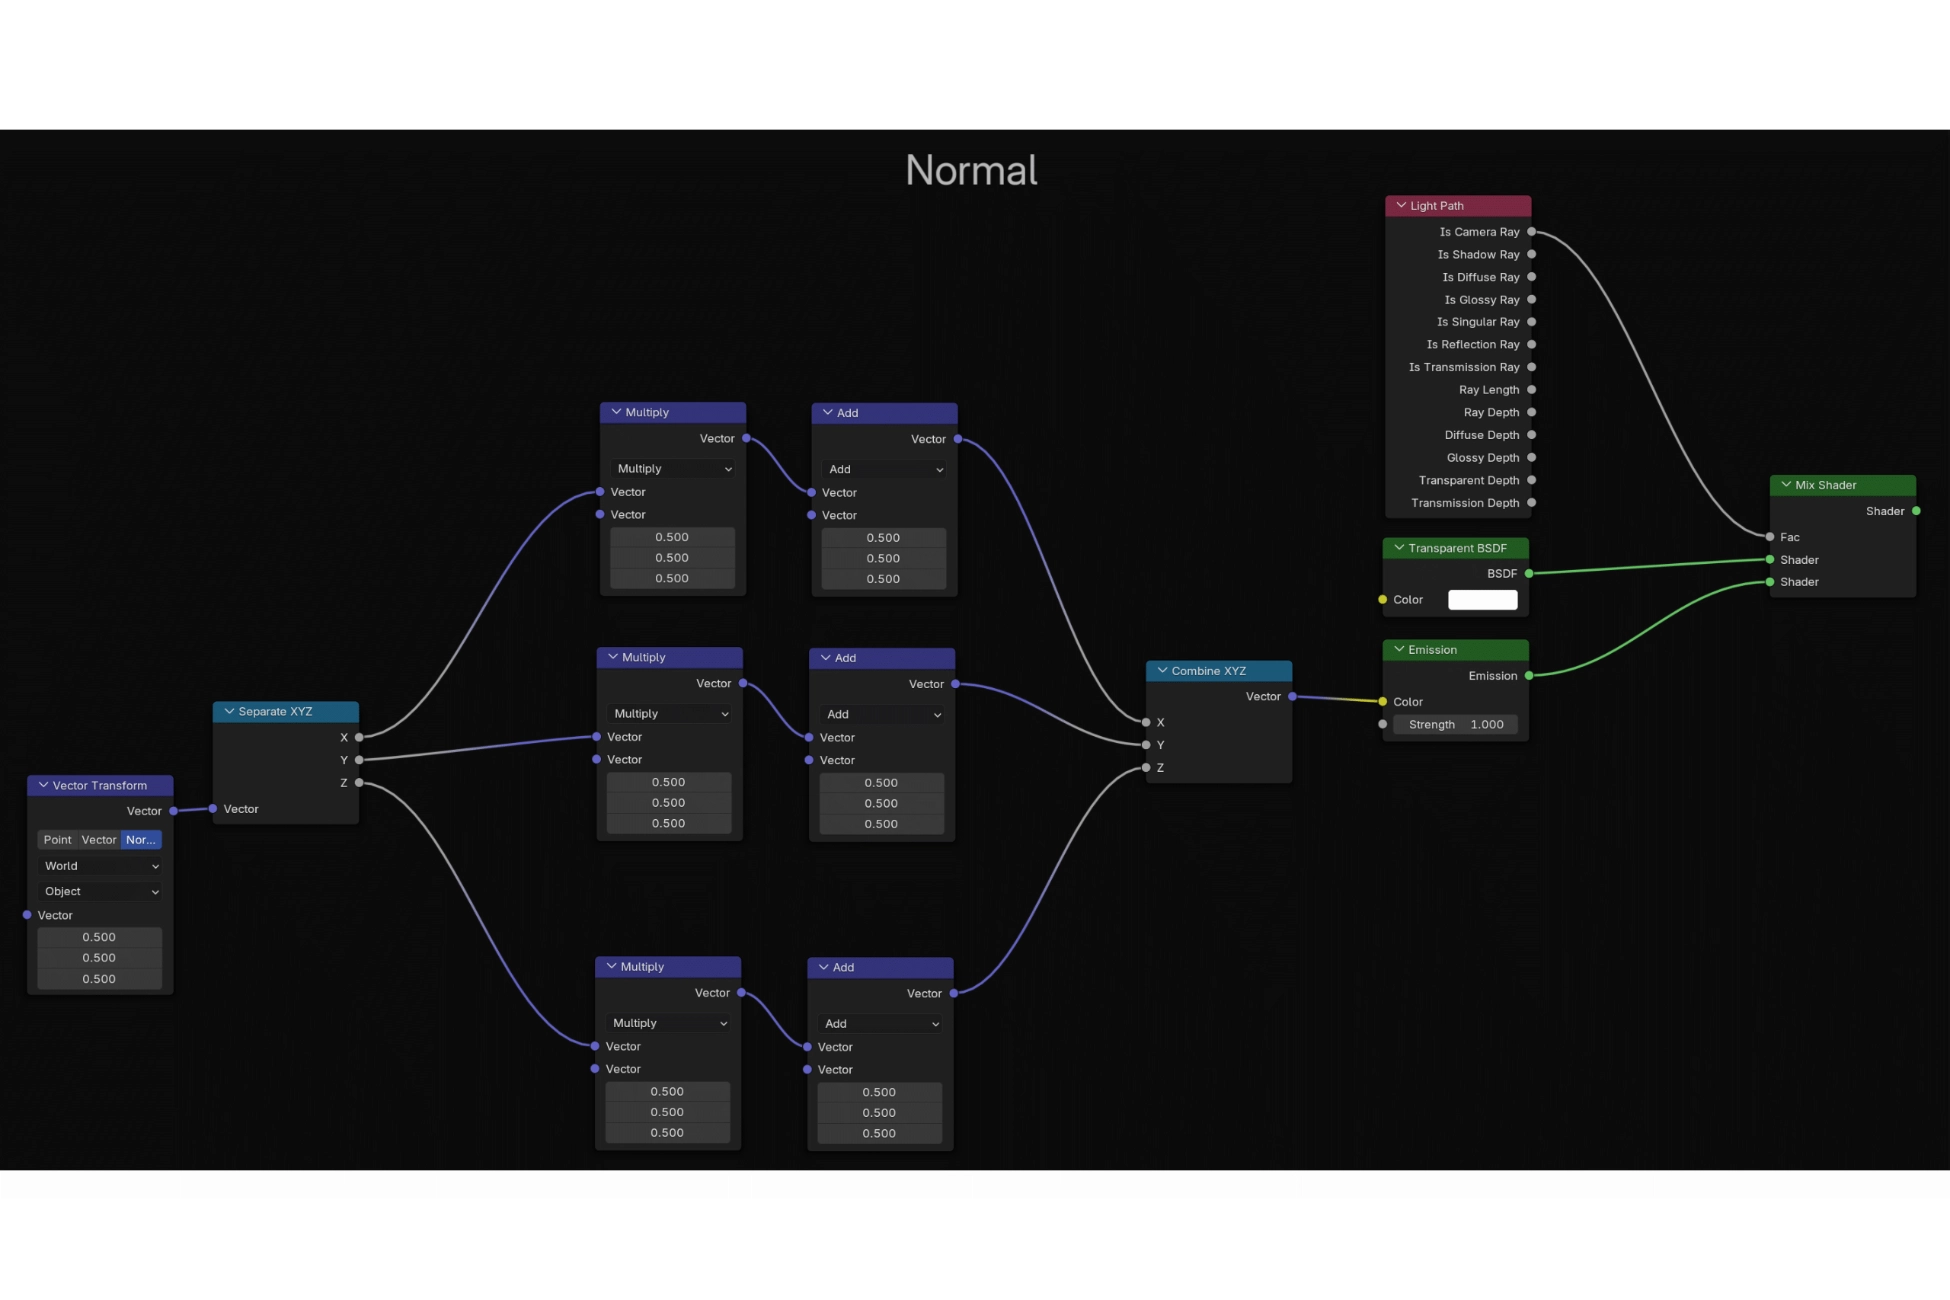
One small but important detail: previewing normal maps inside Blender can be a bit unintuitive, especially because Blender uses world-space coordinates. If you want to visualize your normal map correctly for presentation or documentation, I’ve included a simple compositor node graph that helps generate a proper preview.
TIP: Render Manager is a lifesaver. Especially for projects with multiple render passes and compositing needs.
SCALE
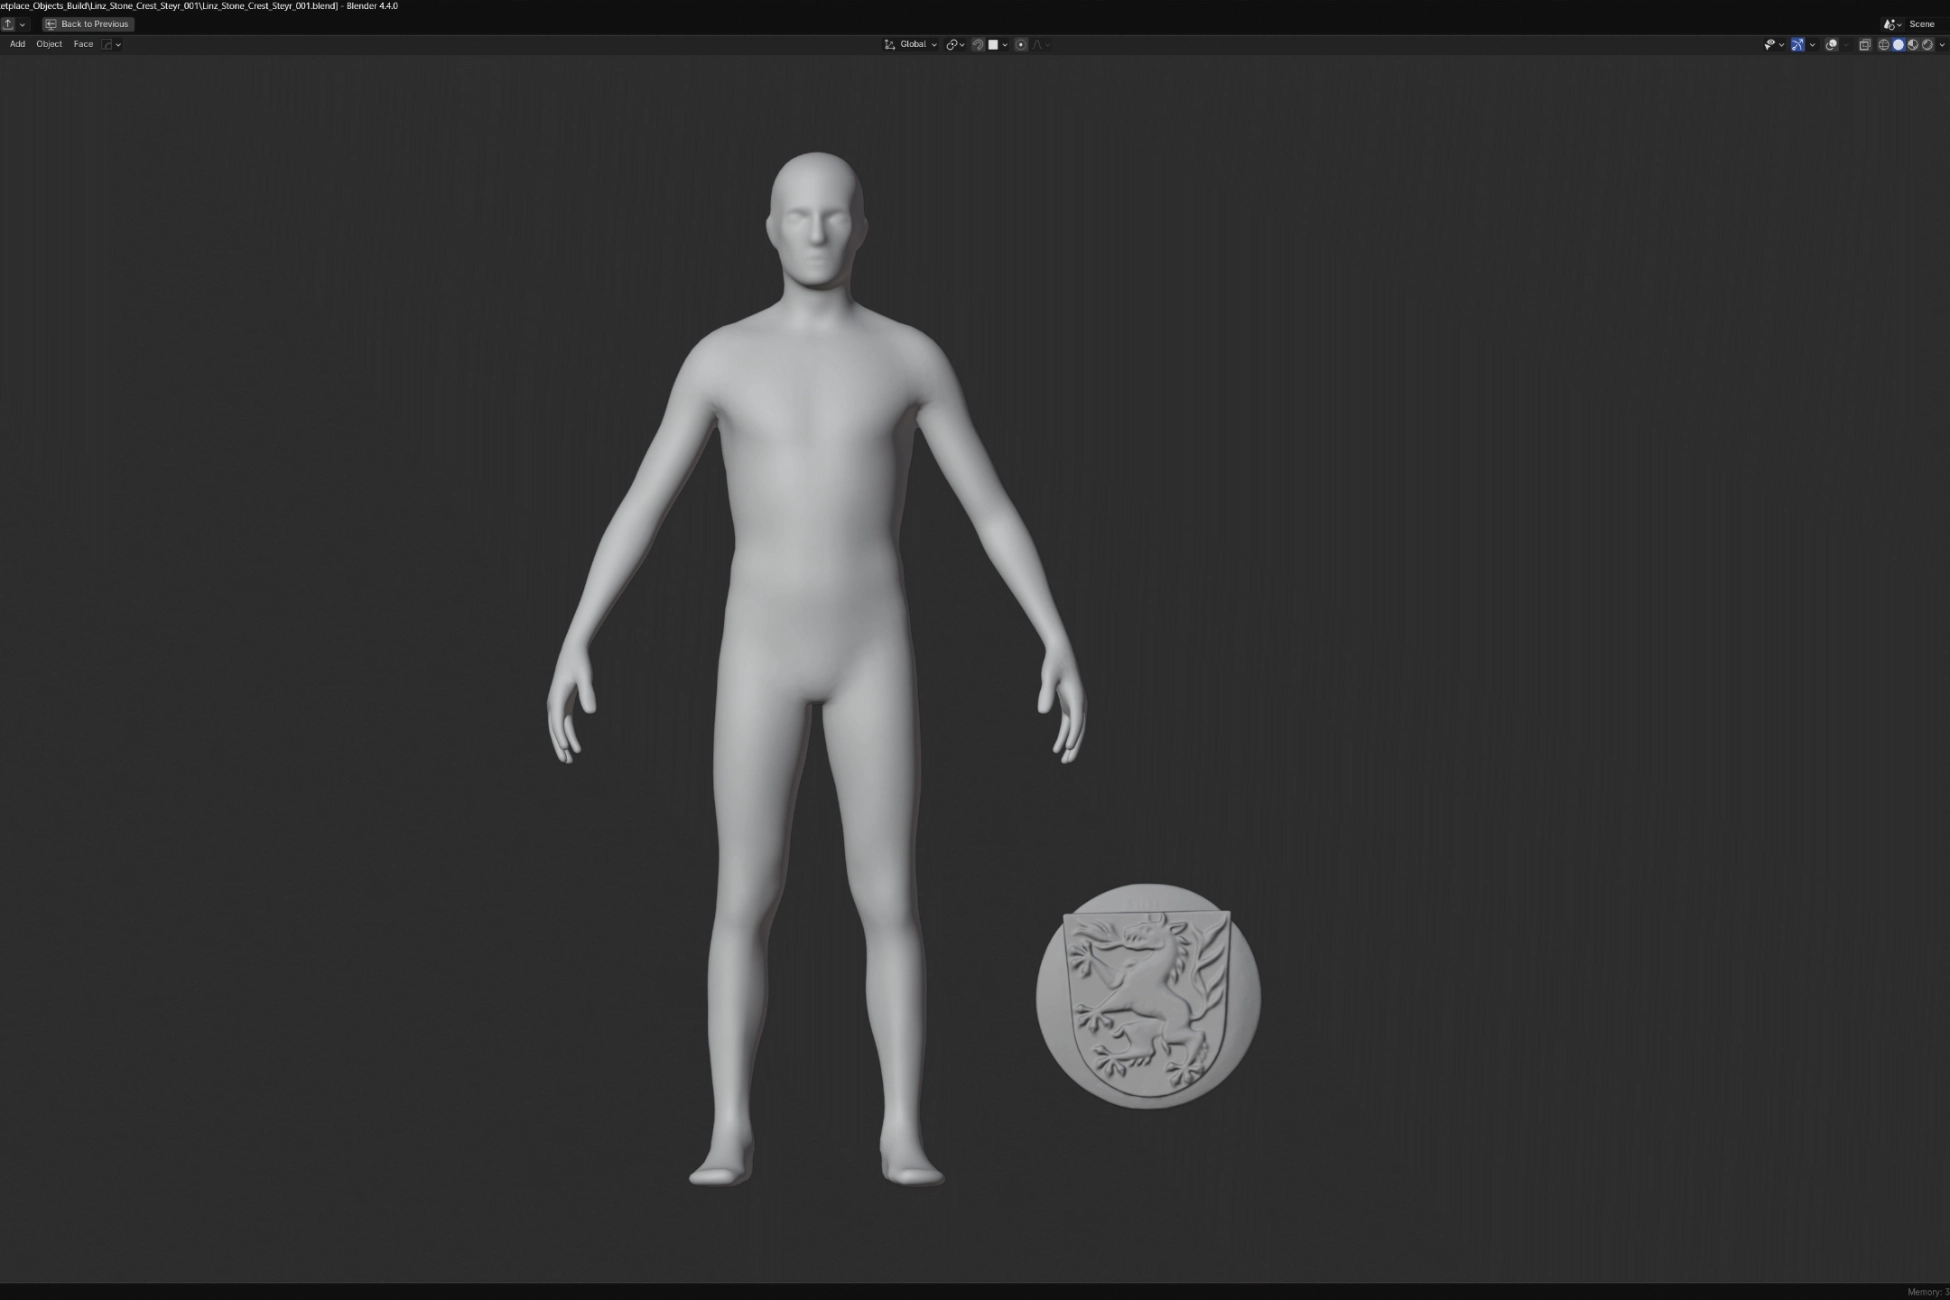
Getting the scale right is often overlooked but it’s absolutely crucial—especially when creating historical or architectural scans meant to blend seamlessly into real-world scenes or larger digital environments. For every asset, I ensure the scale matches real-world measurements as closely as possible.
In Blender, I make sure the scene units are set properly (usually to meters), and then apply scale transforms to ensure the asset is export-ready.
FINAL RESULT

With all technical steps completed—from alignment to reprojection, texturing, and post-processing – it’s finally time to showcase the asset.
The renders below were created in Blender using Cycles, with a calibrated HDRi setup and subtle post-processing done inside Affinity Photo. The goal was to present the asset as faithfully as possible to its real-world counterpart, while still maintaining a clean and consistent visual language across the Madchamo library.
STYLIZED VERSION
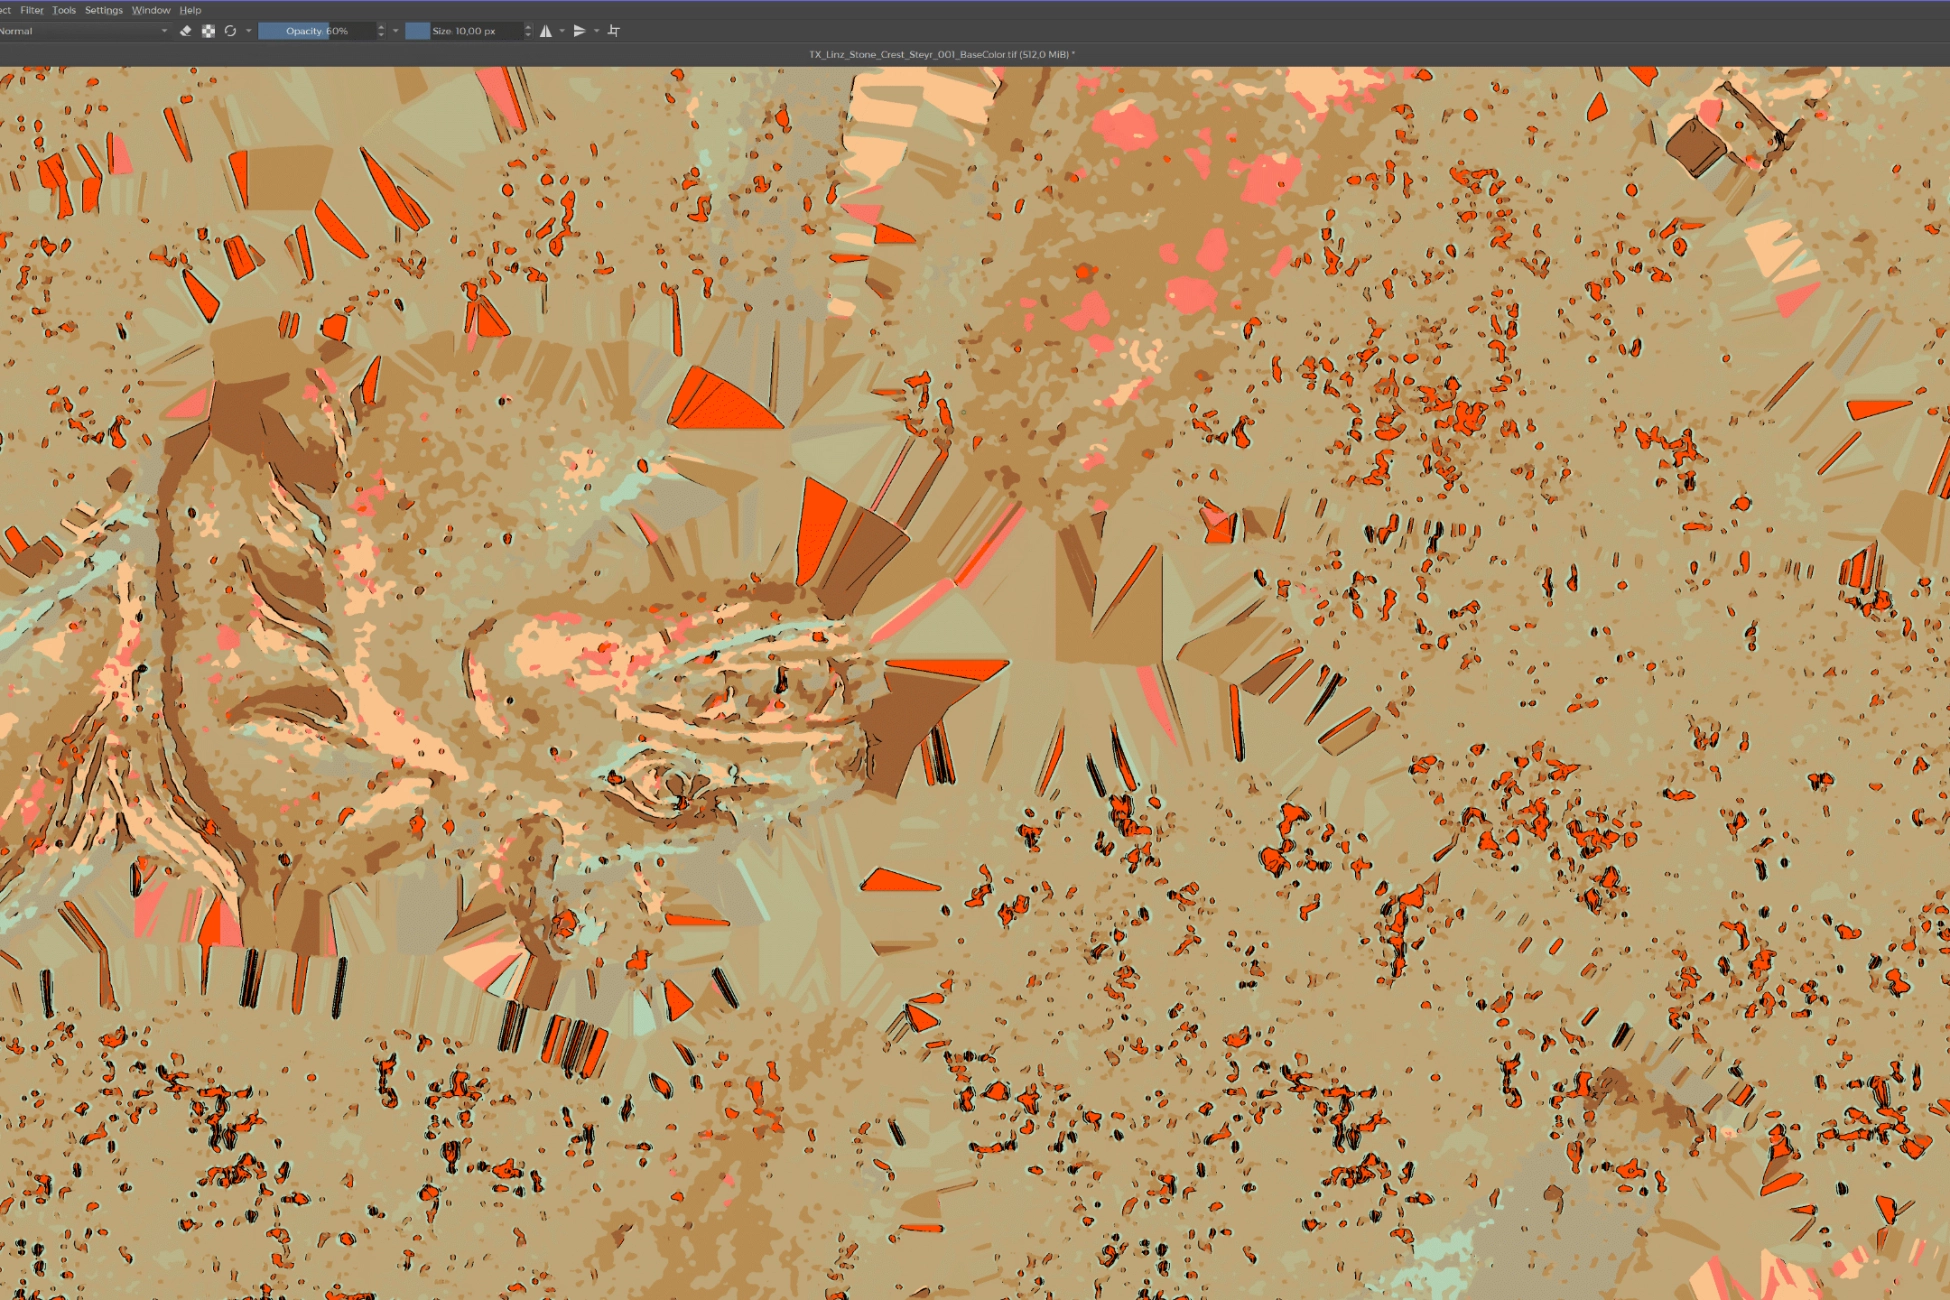
For the stylized variant of the asset, I combined procedural workflows with traditional hand-painted detailing. Using the Stylized node in InstaMAT as a foundation, I further refined the albedo map by hand-painting directly in Krita.
Hand-painting allows me to go beyond automated filters—breaking up visual repetition, introducing unique surface accents, and injecting personality into the piece. It’s this blend of control and creativity that makes the stylized version feel more crafted and expressive, rather than generated.
TIP: Keep a non-destructive workflow by duplicating your original maps and painting over adjustment layers.
Well, that’s it for now.
Thanks a lot for taking the time to read this article, I really hope you learned something, especially if you’re just starting out. And if you’re already a seasoned 3D artist, maybe this gave you a small glimpse into the kind of assets and quality you can expect once the shop goes live.
There’s still a lot of effort going into building the platform, and I’m doing my best to make sure it’ll be something truly worth your while.
If you want to support MADCHAMO in the meantime, feel free to check out MADCHAMO on FAB page and see if there’s anything that could be useful for your current project.
Till next time!
Dipl. Ing. MArch Cosmin Cazacu | Founder of MADCHAMO


